Raise your hand if you rang in the new year with the flu. OK, put it down because that probably hurt if you’re sick. It seriously feels like everyone has the flu. We had it on a 38-hour journey back from Africa, and if you’ve ever wondered what hell is actually like, fly with the flu while watching the sky map on the monitor move less than one pixel per minute. And then have your daughter puke in the car ride on the way home. Happy new year!
Ok, I can’t really complain though because we were on safari in Africa, and — lion cubs. More on my Instagram account.
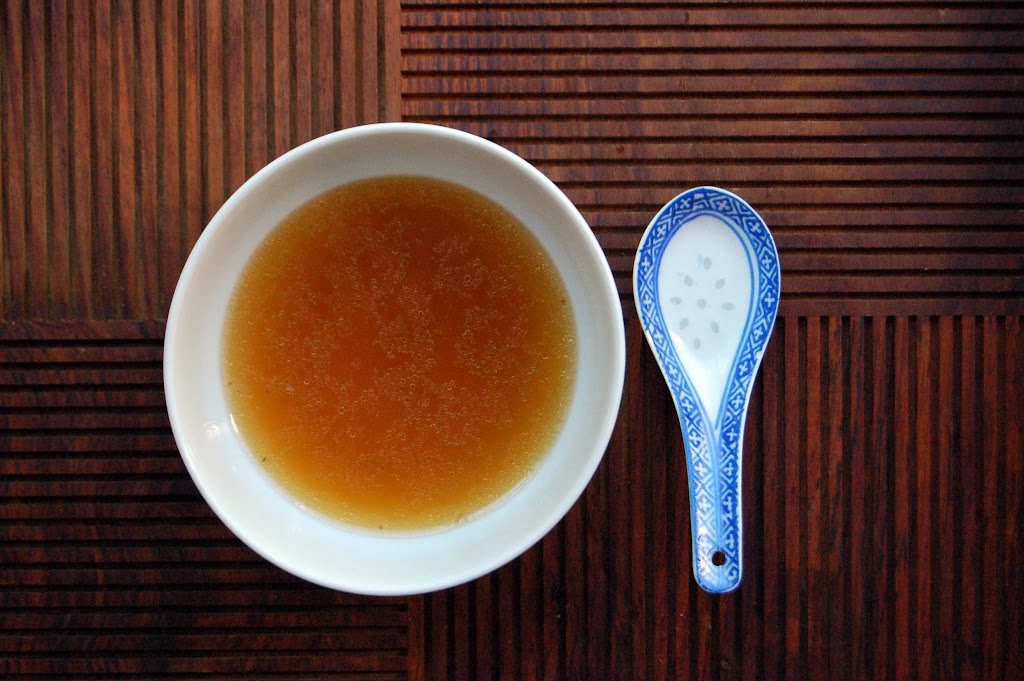
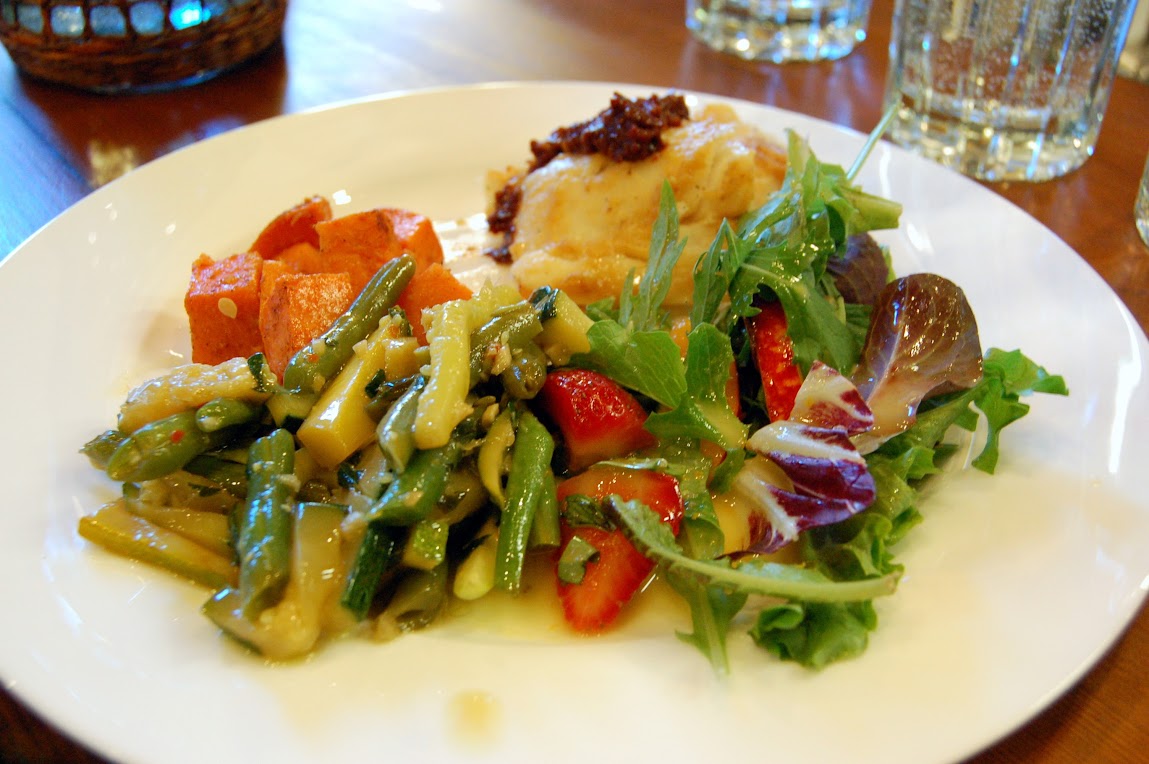
I’m only starting to feel half human at this point, so I’m going to keep this short, and write it on a blog so that I don’t have to use my actual mouth. Everyone knows that there’s nothing better (except maybe Tamiflu) to have on hand than chicken soup when you’re feeling like crap. But not everyone has a mom in the house that can make it for them. All the prep for this can be done while sitting; you throw it in the pot, and walk away. I use an Instant Pot pressure cooker (because I use it for everything nowadays), but you can also just put it on the stovetop on simmer for an hour and a half or so, til the chicken’s tender. Either way!
INSTANT POT CHICKEN SOUP FOR FLU
Ingredients
4 chicken drumsticks or bone-in thighs
2 tomatoes (I used Roma)
6 carrots chopped and peeled
3 ribs celery, cut into 1/2 in pieces
2 cloves garlic
1 diced onion
10 cups water
Two 1/4 inch slices ginger
1.5 TBSP salt or to taste
(if available): one date
Instructions
Put in pot. Set to manual pressure 30 minutes. Go lie down or moan in misery.
When cycle is complete, release pressure. Take out chicken and put on plate; with two forks, pull the meat off the bone and put back into the pot. Eat alone or add in cooked rice or noodles for extra bulk.
Every once in a while, things I grew up with in my Chinese-American household manage to become the latest craze. Supplementary math books, growth mindset, and now: bone broth.
I’ve read tales of people queuing for these magical cups of inflammation-reducing, hair-skin-and-nail-enhancing elixir. While those appear to be attractive benefits of drinking broth, there’s another good reason to give it a try: it tastes really good. And after I have broth, I feel really good.
I’ve been drinking a lot of broth lately because I have a bum knee. For years, running has been my outlet for stress and my ticket to a decent night’s sleep, but years of aggressively pounding on concrete is finally catching up with me. I’ve had pain off and on for a couple of years now, but I really can’t run without pain anymore, and now it’s starting to hurt sometimes when I walk (never mind the gross popping sound it’s making now too). I’m seeing a doctor tomorrow, but for now, broth tides me over.
Sipping broth is a spiritual experience. It feels to me like serenity and replenishment. In our crazy lives there are so few things in life that we can control, so when there are opportunities to create serenity — in my case, like buying a really quiet dishwasher and oven. Broth is way cheaper than either of those!
My daughter made an Asian-style broth in a slow cooker; check out the video below to find out how!
SLOW-COOKER BONE BROTH
Ingredients
1-2 pounds of bones (I like to use a mix of bone types, like chicken and pork; make sure you have a mix of meaty bones and bones with tendon and cartilage, so you get both flavor and collagen into your broth. I save my bones from roasts in the freezer for when I’m ready to make broth.)
1 whole onion, peeled and cut in half
1 head of garlic, cut in half horizontally
1 TSBP whole ginger root
1 cup shitake mushrooms
1 TBSP vegetable oil
Water
Heat the vegetable oil in a saute pan and sear the onion and garlic til browned. Keep them in big chunks as cut so they’re easier to fish out after cooking. Add to slow cooker. Add in bones, ginger and mushrooms, and fill the slow cooker pot with water until just 1 inch below the upper rim.
Cook for 1 hour on high and then 15-23 hours on low. Occasionally skim fat and other matter that floats to the top off the surface of the broth (I find that when I use bones from previous roasts, there’s very little cloudiness to the broth and you don’t have to worry about skimming much. I also prefer the flavor from pre-roasted bones).
Take out the solids (or pour the liquid through a strainer into a large bowl), season with salt as desired, and enjoy! If you want to keep an ongoing broth factory, just keep adding water, bones and veggies (feel free to experiment!) to leftover broth and cook — the flavor will become more complex over time.
I don’t know about you, but I’m pining for summer. We had a lovely, temperate summer here in San Diego and have been suffering through a heat wave for the past couple of weeks. Suffering, I say! Because we San Diegans cannot stand temperature fluctuations greater than +/- 3 degrees.
How was summer for you? It was my first summer in my new life as an independent consultant, which meant that I got to do interesting work, but was still able to take the odd day off and spend a day at the beach with the girls. I’m loving this gig; it’s a privileged position to able to choose the work that I take on, and it helps me with setting boundaries — something I’ve never really been very good at doing.
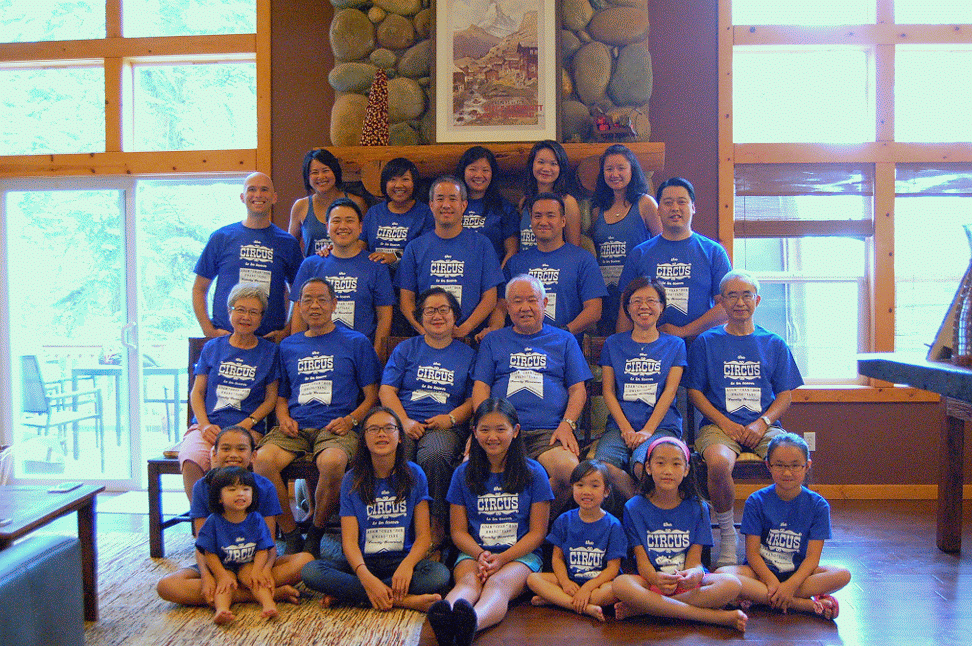
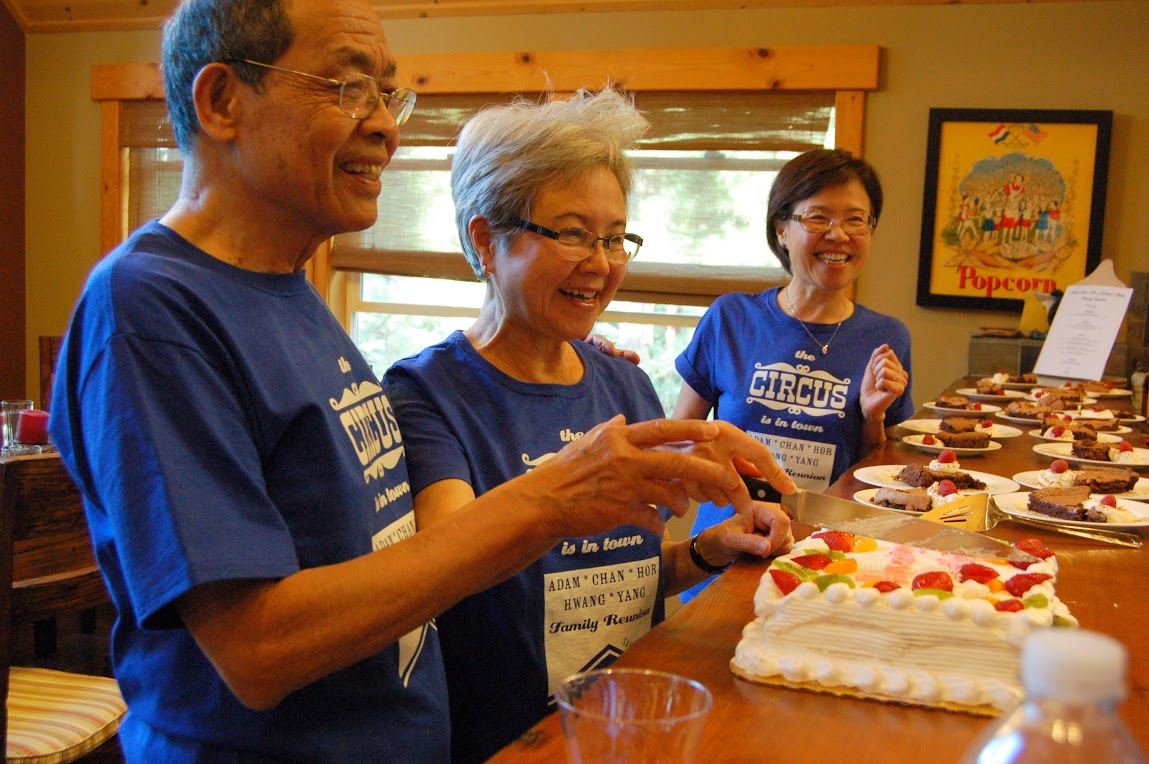
Our big trip of the summer was up to Lake Tahoe, where we had a family reunion with three generations of family from my mom’s side. My mom had 9 kids in her family, so when we have whole-family get-togethers, we usually take up a whole restaurant. This was a scaled-back gathering of the family that’s living the in the United States.
A lively bunch, they are.
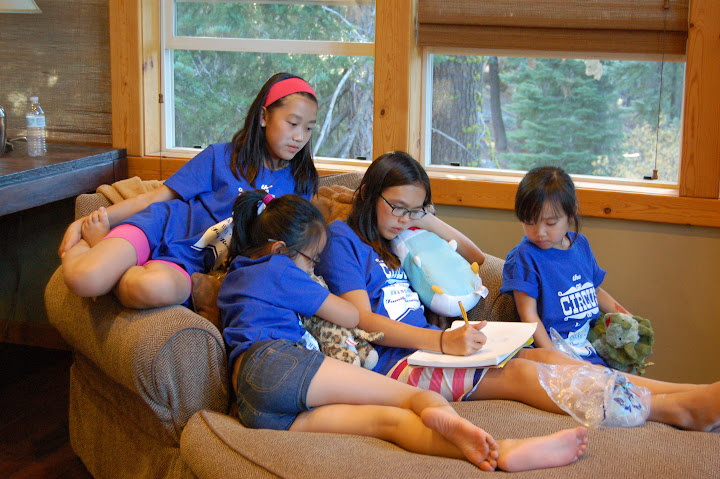
The kids got to do what kids do…you know, making weapons out of sticks…
…and so on…
The lake was nothing short of amazing. Amazing! Clear! Sparkly! Here I am having one of the happiest moments ever, on a paddle board in the middle of this incredible view (photo credit to my cousin Jack!):
Plenty of kayaking and boating to go around too.
And some of us did some tree climbing on a ropes course:
The best thing we did (thanks to the spectacular organization skills of my sister-in-law) was to hire a private chef — Arica from Yummy Fixins — who was soooooooo fantastic. Not only was her food spectacular, but she and her assistant cleaned the kitchen before and after! If you are in Tahoe, it would simply be wrong not to hire Arica.
See those flourless chocolate cake slices in the back? I would fight you for them! The BEST I have ever tasted.
My brother was in charge of martini-making and photo bombing:
My cousins and I used to spend summers together hanging out, torturing one another and generally engaging in what is most accurately described as nonsense, so it was great to have an opportunity to gather us from all the corner of the country to do this all over again, across three generations.
After the reunion, we made our way back down the California coast. If I am ever a cow, please make me a Big Sur cow. They have the most amazing views.
I’ll do a roundup of the coastline drive in another post, but that’s just a taster…isn’t it lovely?
Ah, thanks for allowing me to relive one of the highlights of summer. And now, back to real life. The kids are back in school, we’ve got multiple Google Calendar carpools going on, and a middle school kid in the mix. Our mornings are rushed and the easiest meals are often cereal, so that’s the go-to for the kids.
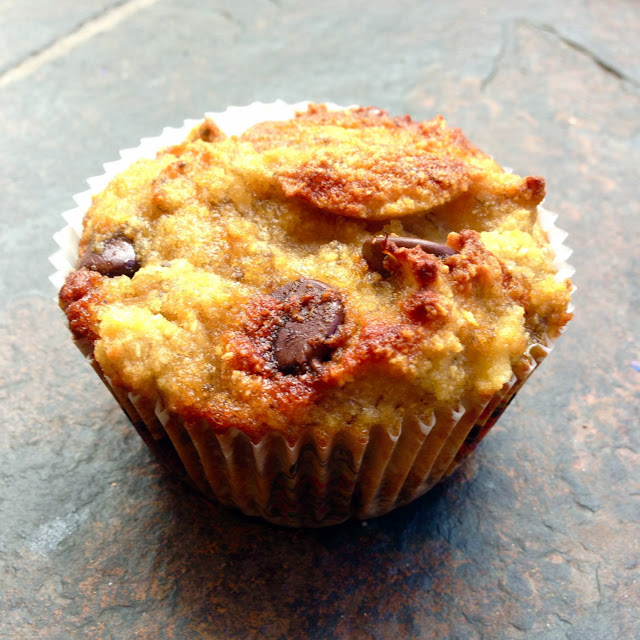
I’ve been adding these gluten-free banana chocolate muffins into the repertoire lately. Now, we all know that I’ve got nothing against gluten, being that I bake my own bread. But these are so easy to make, don’t require a ton of ingredients, and they always, always come out moist. We’ve made a little video below, with the full recipe under the video. Hope you enjoy these — cheers!
GLUTEN-FREE BANANA CHOCOLATE MUFFINS
Ingredients
¾ cup coconut flour
6 eggs
3 ripe bananas, mashed
½ cup raw honey, at room temperature
¼ cup melted coconut oil
1 teaspoon vanilla extract
1 teaspoon baking soda
1 teaspoon chia seeds
¼ teaspoon salt
1/2 cup semi-sweet chocolate chips
Preparation
Preheat the oven to 350F and line a standard muffin tin with 12 baking cups.
In a large mixing bowl, combine the all ingredients except for chocolate chips. Use a spatula to mix well; then fold in the chocolate chips.
Divide the batter among the 12 cups, then bake at 350F for 23-25 minutes, until the edges are golden the centers of the muffins feel firm to a light touch. Allow the muffins to cool for at least 20 minutes before serving.
Store these in the fridge if not eating immediately.
Since December, I’ve been spending a disproportionate amount of time in sweatpants. Factors driving this behavior:
They are the symbol of freedom.
Nothing beats an elastic waistband when you’re eating. NOTHING.
This is the year of the cute sweatpant (or, jogger, as it’s been rebranded). There are the printed type, which I like in concept but which always look like pajamas on me (probably because I refuse to wear heels with them, which I feel defeat the purpose of achieving ultimate comfort), and the solid type; these from Athleta are my all-time favorites (I got them for Christmas — thanks San-do-ra!).
I left my executive job and am now consulting, mostly from home. I was just finding that even when I was at home, I was never mentally available to my family…I have a real problem compartmentalizing work (plus there were the weird hours and challenges of working in an international business). It’s been a lot easier now that I’m in full control of my work and time…and plus I can wear sweatpants.
There are, of course downsides to the exclusive wearing of elastic waistbands. The other night I went out to dinner for a friend’s birthday, and, as it was at a restaurant, I thought the occasion warranted pants (and not the elastic waistband kind that is made to mimic pants, which I have — but the real kind with a zipper and button and everything). Turns out if you move into real pants after weeks of wearing joggers, you have to go to the bathroom every 20 minutes from the extra pressure. Also, you may find yourself thinking things like, “Why should I have a separate wardrobe for sleeping?” Still, a small price to pay for the otherwise boundless joy.
While I was sitting around in my sweatpants over the holidays, we had visitors. My brother and his family came to visit. The girls had so much fun with their little cousin, who is a big fan of hats.
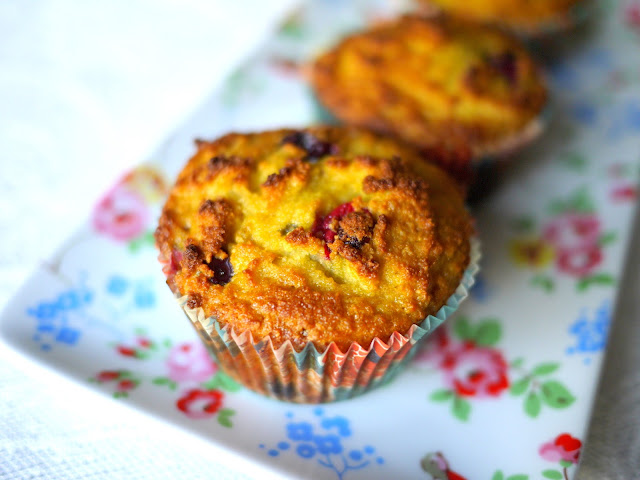
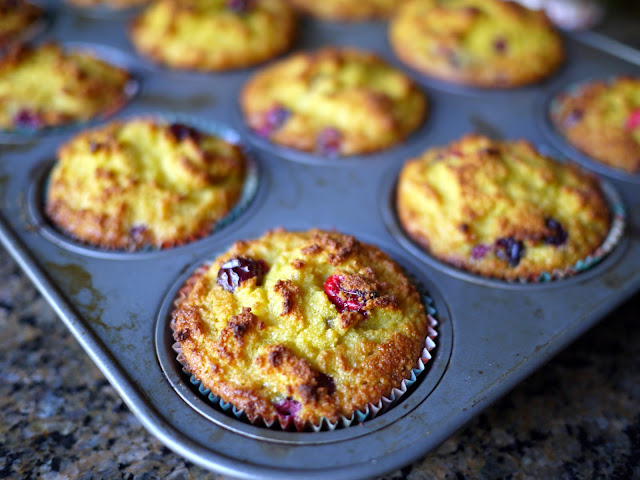
My brother has a gluten intolerance, and since I also had a friend visiting that week with celiac disease, I thought I’d try to make some gluten-free muffins (which also happen to be naturally sweetened) from paleo blogger Detoxinista. I added shredded coconut and chia seeds for some extra crunch and texture. I had pretty low expectations since most gluten-free baked goods I’ve seen looked kind of flat and generally unappetizing, but these orange cranberry guys puffed up nicely:
And, they were nice and moist. I’ve tried this recipe with a number of variations, and you can pretty much add in any combination of flavors and arrive at a nice paleo muffin.
My favorite part about the recipe — it’s a one-bowl wonder. Just throw everything into a bowl, mix it up, pour into muffin tins and bake! Leave me a comment if you try a different variation — I’d love to know about any winners!
PALEO GLUTEN-FREE ORANGE CRANBERRY MUFFINS
adapted from Detoxinista
Ingredients
¾ cup coconut flour
6 eggs
½ cup orange juice
Zest of one orange (about 2 teaspoons)
½ cup pure maple syrup or raw honey, at room temperature
¼ cup melted coconut oil
1 teaspoon vanilla extract
1 teaspoon baking soda
1 teaspoon chia seeds
¼ teaspoon salt
1 cup fresh cranberries
1/4 cup shredded coconut
Preparation
Preheat the oven to 350F and line a standard muffin tin with 12 baking cups.
In a large mixing bowl, combine the coconut flour, eggs, orange juice, zest, maple syrup, coconut oil, vanilla, baking soda, chia seeds and salt. Use a whisk to mix well, breaking up any clumps, then fold in the fresh cranberries and the shredded coconut.
Divide the batter among the 12 cups, then bake at 350F for 23-25 minutes, until the edges are golden the centers of the muffins feel firm to a light touch. Allow the muffins to cool for at least 20 minutes before serving.
Since these muffins are very moist, leftovers should be stored in the fridge for best shelf life, but bring them to room temperature again before serving for best flavor and texture.