Category Archives: Cooking

Cooking Food

Ajiaco

It’s hard to believe that it’s been 7 years since my trip to Colombia, and it feels like almost 7 years since I’ve posted. It’s all good though…I’ve been busy living my offline life. It’s been a little over a year since I jumped ship and became my own boss again, which has been fantastic and full of wonderful people and interesting work. I’ve been shuttling people around to volleyball-related things. I injured my knee and recovered (with the assistance of the physical therapists for the Padres…perhaps just a little overkill for my esteemed neighborhood running career). And we just got off of FaceTime with my 3-year-old niece who calls us when she needs to be coached through pooping. I’m so glad she thought of us.

We got some winter beach days in too, which is always nice — I love it when the beaches are pretty empty.

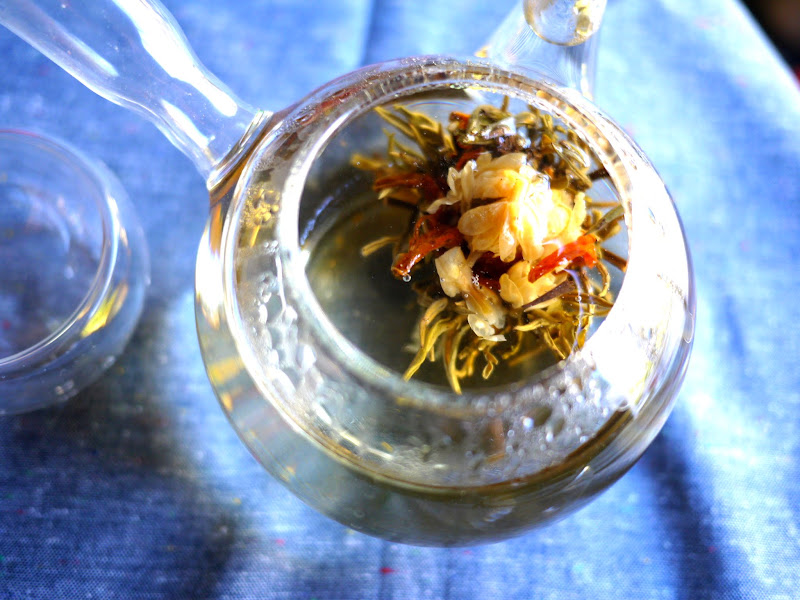
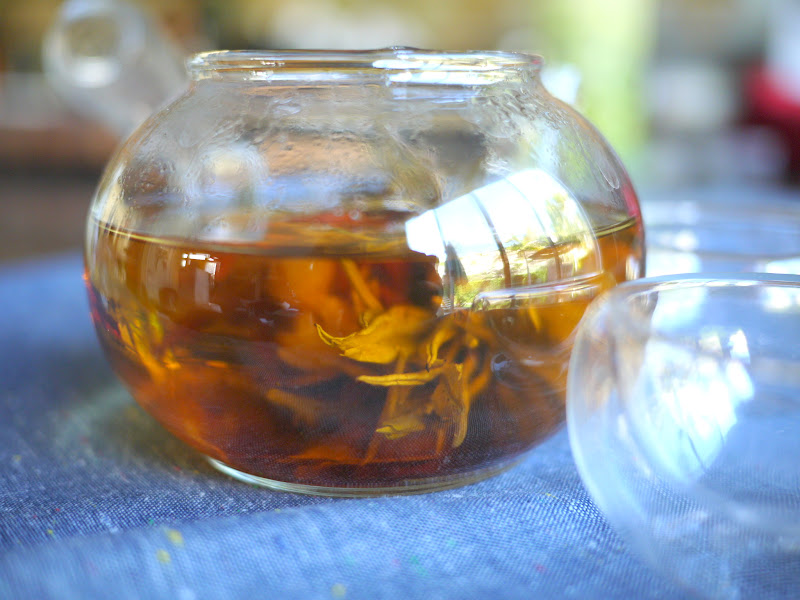
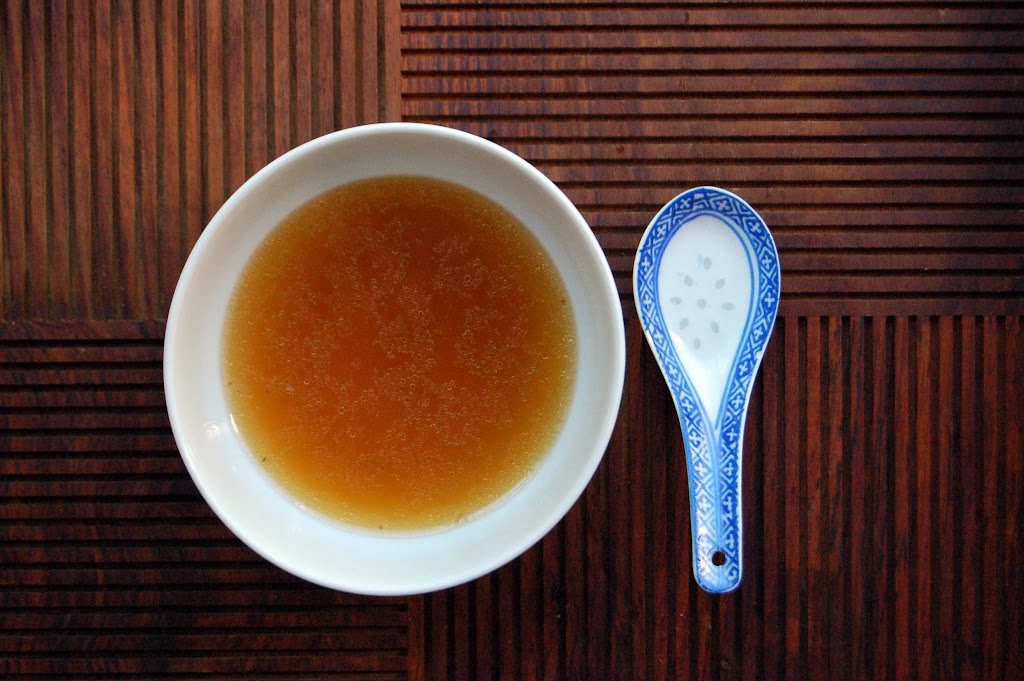
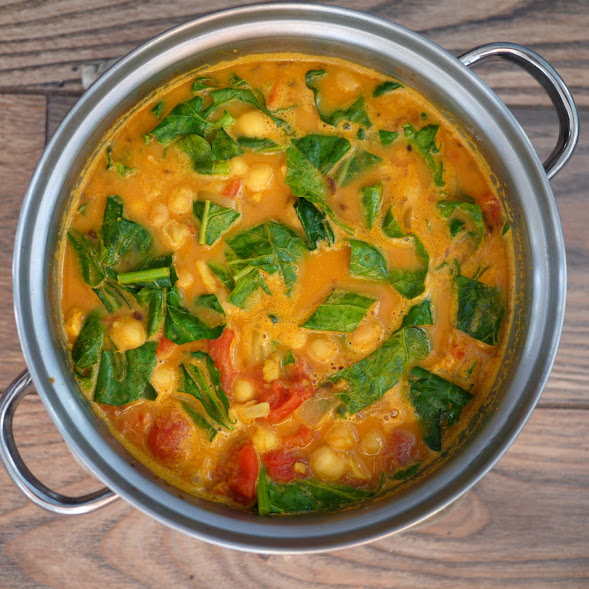
This springy time of year always reminds me of Bogota for some reason, and the delicious soup that we ate at our hosts’ farm, serenaded by peacocks. Ajiaco is a Colombian soup in a delicious broth, with a hearty helping of vegetables. The potatoes they use in Colombia aren’t available here, as far as I can see, but we can get pretty close. Spring is such a hybrid type of season that ajiaco — with its mix of rich broth and fresh ingredients — seems a perfect fit.

AJIACO by Tania Sigal from Fine Cooking

For the soup:
  • 3 lb. cut-up chicken, skin removed, rinsed well
  • 1 large white onion, peeled and cut into quarters
  • 1 leek (white and light green parts only), cut into 1-inch rings, and rinsed thoroughly
  • 1 green bell pepper, seeded and cut into 1-inch pieces
  • 2 ears fresh corn, cut crosswise into quarters
  • 2 ribs celery, cut into 1-inch pieces
  • 2 large carrots, peeled and cut into 1-inch pieces
  • 3/4 lb. Yukon Gold potatoes, peeled and cut into 1-inch cubes
  • 3/4 lb. Idaho potatoes, peeled and cut into 1-inch cubes
  • 3/4 lb. small red potatoes, peeled and cut into 1-inch cubes
  • 6 cloves garlic, peeled
  • 1/2 cup fresh cilantro leaves
  • 2 chicken bouillon cubes
  • 1 Tbs. kosher salt; more to taste
  • 1/2 tsp. ground black pepper
For the aji:
  • 4 scallions (white and light green parts only)
  • 1 medium tomato, peeled and seeded
  • 1 small white onion, peeled
  • 2 fresh Scotch bonnet or habanero chiles or 2 fresh hot red chiles, stems and seeds removed (wear gloves, and don’t touch your eyes)
  • 3 Tbs. fresh cilantro leaves
  • 3 Tbs. white vinegar
  • 1/4 tsp. kosher salt
For the garnishes:
  • 2 ripe avocados, peeled and cut into 1/2-inch cubes
  • 1 cup sour cream or crème fraîche
  • 1/2 cup nonpareil or other small capers, rinsed and drained (if using large capers, chop them coarsely)
  • 1/2 cup chopped fresh cilantro leaves
Make the soup:

Put the chicken in a large (at least 8-quart) stockpot and add 8 cups water. Bring to a boil over high heat and then reduce the heat to a vigorous simmer. Simmer for 10 minutes, frequently skimming off the foam that floats to the surface.

Add all the vegetables, the garlic, the cilantro, and the bouillon cubes to the pot, along with the salt and pepper. Stir a few times to distribute the vegetables and submerge as many of the solids as possible. When the broth returns to a gentle boil, partially cover the pot and simmer, stirring once or twice, for 1-1/2 hours. Taste for salt and add more if needed.

Using tongs or a slotted spoon, pick out the chicken pieces and put them on a large plate. Stir the soup with a large spoon, breaking up some of the potatoes to thicken the soup slightly. Keep hot if serving soon or let cool and refrigerate.

When the chicken is cool enough to handle, pull the meat off the bones and shred it by hand. Discard the bones and tendons, and put the shredded chicken in a serving bowl.
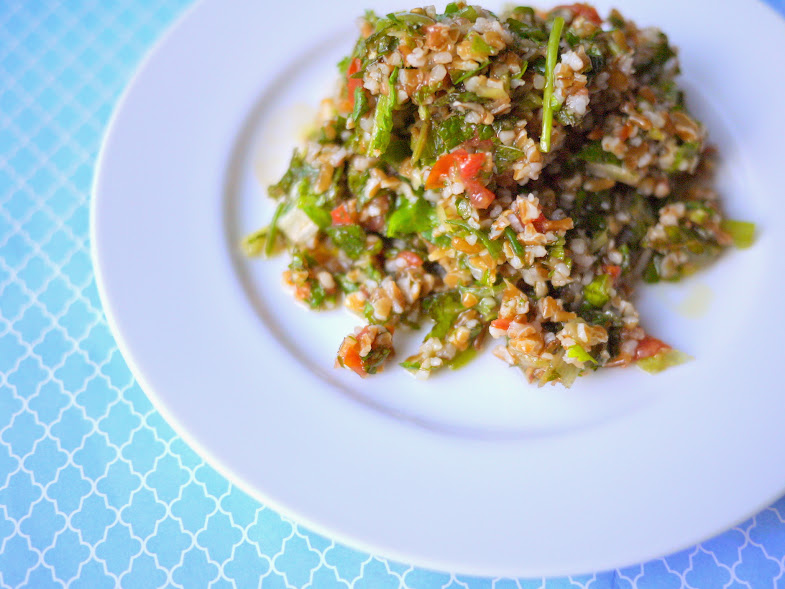
Make the aji:

In a food processor, pulse all the aji ingredients until they’re finely minced. Transfer to a serving bowl.

Serve the ajiaco:

Put the avocados, sour cream or creme fraiche, capers and cilantro leaves in small bowls and set them on the table along with the bowls of shredded chicken and the aji. Reheat the soup if necessay and ladle it into large soup bowls, putting a quater ear of corn in each bowl. Let your guests add the garnishes and the aji as they like.

Make Ahead Tips

The soup and the aji can be made a day ahead. If the soup is too thick after it’s reheated, thin it with a little water.

Cooking Food Lifestyle

Jasmine Brocade Tea – FarLeaves

I am loving this cooler weather because it gives me an excuse to wear sweaters — like my favorite swing-style sweater with tennis rackets on it (which only implies that I play tennis, despite the fact that this is the first time this year I have used the word “tennis”). Sweater season is so short in southern California that I have to take full advantage of it…and so I have. Since I work from home most days and appear to people only via videoconference, I’m able to embody the mullet of outfits. Today’s mashup: cashmere sweater with statement necklace up top; fleece lined sweatpants and fuzzy slippers on the bottom.

The other amazing thing about cold weather is cradling hot drinks. I placed a Christmas order with Far Leaves Tea recently, because 1) it’s served in Michelin-starred restaurants like Quince and Chez TJ, and I do not currently have access to a Michelin-starred restaurant so this will do; 2) it was featured in this year’s New York Fashion Week, which I also do not have access to, with much fanfare, and 3) my sister-in-law just joined their team. Also, did I mention that it’s served by tea sommeliers in high end restaurants (hm, tea sommelier, has a nice ring to it. Perhaps a future career.)? And that Google brought them in to train them on how to properly brew tea?


One of the things that arrived was a beautiful gift box wrapped in a bespoke Far Leaves tea towel. Inside was this:

Those little balls on the left are Jasmine Brocade tea. When you add water to these little guys, they start to blossom:

unfurling slowly:

til they’re in full bloom:

Wanna see it in action? Watch here:

This added a touch of sophistication to my otherwise sweater-sweatpants day. The best news? FarLeaves has kindly offered a promo code to share with my readers! Enter code xmas15 at checkout to get 10% off your online order. Because I can’t think of anyone who wouldn’t want tea like this!

Happy brewing!


Cooking Food

How to Make Bone Broth in a Slow Cooker

Every once in a while, things I grew up with in my Chinese-American household manage to become the latest craze. Supplementary math books, growth mindset, and now: bone broth.

I’ve read tales of people queuing for these magical cups of inflammation-reducing, hair-skin-and-nail-enhancing elixir. While those appear to be attractive benefits of drinking broth, there’s another good reason to give it a try: it tastes really good. And after I have broth, I feel really good.

I’ve been drinking a lot of broth lately because I have a bum knee. For years, running has been my outlet for stress and my ticket to a decent night’s sleep, but years of aggressively pounding on concrete is finally catching up with me. I’ve had pain off and on for a couple of years now, but I really can’t run without pain anymore, and now it’s starting to hurt sometimes when I walk (never mind the gross popping sound it’s making now too). I’m seeing a doctor tomorrow, but for now, broth tides me over.

Sipping broth is a spiritual experience. It feels to me like serenity and replenishment. In our crazy lives there are so few things in life that we can control, so when there are opportunities to create serenity — in my case, like buying a really quiet dishwasher and oven. Broth is way cheaper than either of those!

My daughter made an Asian-style broth in a slow cooker; check out the video below to find out how!


SLOW-COOKER BONE BROTH

Ingredients

  • 1-2 pounds of bones (I like to use a mix of bone types, like chicken and pork; make sure you have a mix of meaty bones and bones with tendon and cartilage, so you get both flavor and collagen into your broth. I save my bones from roasts in the freezer for when I’m ready to make broth.)
  • 1 whole onion, peeled and cut in half
  • 1 head of garlic, cut in half horizontally
  • 1 TSBP whole ginger root
  • 1 cup shitake mushrooms
  • 1 TBSP vegetable oil
  • Water

Heat the vegetable oil in a saute pan and sear the onion and garlic til browned. Keep them in big chunks as cut so they’re easier to fish out after cooking. Add to slow cooker. Add in bones, ginger and mushrooms, and fill the slow cooker pot with water until just 1 inch below the upper rim.

Cook for 1 hour on high and then 15-23 hours on low. Occasionally skim fat and other matter that floats to the top off the surface of the broth (I find that when I use bones from previous roasts, there’s very little cloudiness to the broth and you don’t have to worry about skimming much. I also prefer the flavor from pre-roasted bones).


Take out the solids (or pour the liquid through a strainer into a large bowl), season with salt as desired, and enjoy! If you want to keep an ongoing broth factory, just keep adding water, bones and veggies (feel free to experiment!) to leftover broth and cook — the flavor will become more complex over time.


Cooking Food

Tabbouleh

I am mobile blogging to you today from beautiful Torrey Pines State Reserve!

I decided to rely on my middle-aged brain instead of checking my calendar, so have arrived an hour early to meet a friend and still have time to kill after forcing myself to do a run. So mobile blogging!

Ok, timely info: it’s almost Mother’s Day, and I don’t know about you, but my mom is a big fan of saving money. Rejoice: my friends over at OpenTable let me know that you can enter to win one of 10 $150 restaurant gift cards! I entered of course, and I think you should too. Here’s the link; if you win, I also think that you should invite me, even if it’s not technically in OpenTable’s contest rules.

Now, next in the series on foods that are as much fun to say as they are to eat: tabbouleh! I love tabbouleh, and so does my younger kid — we just love the awesome texture of the bulghur wheat couples with the tangy goodness of lemon juice and the party that mint and scallions bring to the table.

Tabbouleh is also super easy to make. Here, my apprentice shows you how. It’s a fantastic make-ahead option too — tastes even better if you give the flavors time to develop.

The recipe that we use is from Alice Waters, in The Art of Simple Food:


TABBOULEH SALAD

Makes 4 servings.

Ingredients

1/2 cup bulgur wheat

11/2 large bunches parsley (about 11/2 cups chopped)

1 bunch mint (about 1/3 cup chopped)

1 bunch scallions, white and green parts (about 1 cup chopped)

2 ripe medium tomatoes, cored and diced small

Juice of 1 lemon

Salt

1/4 cup extra-virgin olive oil

Preparation

To prepare bulgur: Place bulgur in bowl. Alice says to add cold water to cover by 1 inch, but I add boiling water — I like the tabbouleh a little softer. Soak for 20 minutes or until grains are plump. Drain in sieve.

To mix salad: Meanwhile, in large bowl, combine parsley, mint, scallions and tomatoes. Using hands, squeeze soaked bulgur to remove as much water as possible. Mix bulgur into chopped herbs and tomatoes. Add lemon juice, salt and olive oil. Mix well. Taste and add more salt, lemon juice or oil if needed. Let rest for 1 hour before serving to allow bulgur to absorb flavors.


Cooking Food

End Grain Cutting Boards: Selection and Care

I have thing for sharp knives: Japanese knives, especially, because who can resist the lore of a family of swordsmen who moved into making knives after the decline of the sword market? How often do you get to use the phrase “sword market”? On my Facebook page, you’ve probably noticed that I frequent a Japanese knife merchant at a local farmer’s market, where I often slice more than a salad’s share of tomatoes and document my unhealthily long wish list of knives. I must be descended from swordsmen, most probably the royal type, which must render me too noble for housework, right?

Til that theory is validated, I’ll have to keep cooking my own meals and for that, I like sharp knives. Which is why I invested recently in some end grain cutting boards. The young apprentice and I made a quick video for you above telling you what to look for and how to care for end grain boards.

***Update: some of you have let me know that the subscribe button in the video doesn’t work when you’re on a mobile device! So if you’d like to subscribe to our YouTube channel, just click here: http://www.youtube.com/channel/UCS3uHNur9XG60vG0LbHoMHw?sub_confirmation=1 . Thanks! ***

End grain boards (also often called butcher blocks) are boards made up of blocks of wood cut against the grain. When you cut into an end grain board, the individual wood fibers bend away from the blade, providing less resistance and thus prolonging the sharpness of your blade. These boards are more expensive than other types of boards typically, but a quality board should

Here’s what you need to know:

  • Get a board that’s made of maple or walnut. They have the right balance of strength and flexibility to last you a long time. There are cheaper, acacia board out there but the wood is harder and therefore tougher on the knife blade.
  • Given a choice, definitely get rubber feet put on your boards. This not only prevents the board from slipping, but also ensures that it doesn’t sit in standing water. Your board is basically blocks of wood glued together, so prolonged exposure to water not only loosens the glue, but can cause warping on your board.
  • Ditto for the top side of the board – avoid prolonged exposure to liquids, and always wipe down the surface of the board after chopping or rinsing. I use a mild detergent just to scrub the surface but don’t leave the water on for long before wiping down with a dish towel.
  • After some use, your board will start to whiten in some areas, where the sealant has worn away. When your board is dry, rub it with some walnut oil (see video above) and then let it cure. Don’t use olive or canola oil, as they go rancid; mineral oil is another popular option. Make sure whatever oils you use are food grade.

When I shopped around for boards, I found a fantastic selection from individual artisans on Etsy. I decided to get one board for fruit, one for veggies and a third for meat. My favorite board was a maple one from Etsy seller Live Grain Designs, which offered beautiful workmanship and quick turnaround time. I also have a walnut one from End Grain Up that is excellent — and he does custom work.

Do ensure that you’re getting an end grain and not edge grain board though — edge grain is less expensive, and doesn’t have the same give of the fibers when you cut in. Here’s a good link describing the difference between the two.

This is a knife I covet that is on an edge grain, not end grain, board.
This is an end grain board; you can see it’s made of individual blocks glued together (photo courtesy of Live End Designs).

The best knife sharpening I’ve found is with the Japanese knife merchant at my local market – he does it by hand and the blades come back scary sharp. I’ve used some sharpeners who use machines too – but I’m kind of precious about my Japanese knives so I haven’t taken them to a machine yet. Definitely comment and let me know if you have any great tips on how to keep knives sharp!


Cooking Food

Apricots with Mascarpone Cream

I am currently in that circle of hell reserved for people who blog about food but cannot eat it. I’ve had some kind of stomach virus (I think. Or it could be worms. That is exactly what I need. Worms.) since last weekend and though I hadn’t been hungry all week, I am very hungry now but the stomach is not accepting donations.

I’ve generally been feeling weird lately, and part of it I attribute to aging. I can’t remember anything anymore. I recently went away on a girls’ weekend (which, sadly, ended at some point) and the whole weekend was full of conversations like:

“So I have a friend that lives in…African country! Abject poverty! Blood diamonds!”

“The Congo?”

“Right! This is just like that game…shouting out clues! Have to guess the word! Board game!”

My friends and I, we are losin’ it. But the good news is that soon we won’t remember to care.

The other good news is that it’s apricot season. Apricots just look so…peachy to me — like a teenaged girl with good skin (I would never know what that’s like). I got a box of apricots from my CSA and made this dessert which I promise may be the best thing I’ve ever tasted (it’s  large category, that.). Seriously though it is incredibly awesome, like as awesome as if your tongue were a skating rink and Olympic skaters were winning the gold medal on it.

Some incredibly gifted person named Miki posted this on Allrecipes but I modified it a bit to add a bit of citrus and floral aromas, substituting lemon curd for apricot nectar, marmalade for apricot preserves and using a violet flavored balsamic vinegar .

APRICOTS WITH MASCARPONE CREAM adapted from Allrecipes

Ingredients

  • 3 TBSP sugar
  • 4 oz mascarpone cheese
  • 2 TBSP lemon curd
  • 1/2 tsp vanilla extract
  • 1 pinch ground cardamom
  • 3 TBSP marmalade
  • 1/4 cup honey
  • 1 TBSP balsamic vinegar (I used violet flavored vinegar)
  • 8 fresh apricots, pitted and halved

Preparation

  1. Beat the cream in a chilled bowl with an electric mixer until soft peaks form. Beat in the sugar and set aside. In another bowl, whip the mascarpone cheese with an electric mixer until very soft; beat in the lemon curd, vanilla extract, and cardamom. Gently fold the mascarpone mixture into the whipped cream.
  2. Place the marmalade and honey into a microwave-safe bowl and heat in microwave oven until warm but not hot, about 30 seconds. Mix well and stir the balsamic vinegar into the honey mixture.
  3. Stuff each apricot half with a dollop of the mascarpone cream and place the filled apricot halves on a serving dish. Drizzle the fruit and plate with balsamic sauce and serve.

Serves 8 (or 1, if it’s me).

Cooking Food Popular

The MasterChef in My Kitchen

Have you ever watched MasterChef Junior? It’s like The Hunger Games and The Food Network put together minus the killing. Anyway, I can’t get through a MasterChef Junior episode without weeping — I just get so sad when those kids cry! Which is why I was glad that we moved on to MasterChef Season 4. And why my kids talk like Gordon Ramsay at dinner every night. I think we watched the whole season within a couple of weeks.

Several of the contestants on Season 4 were from San Diego. One day, when I was driving on the highway, I could have sworn I saw Lynn — one of the top 10 contenders — in his car. When I got home I told the kids and they squealed like little girls (ok, they are little girls) and peppered me with questions about the encounter (which, I remind you, was just me thinking I saw someone who was maybe potentially him on the highway, for which “encounter” is a strong word).

My older girl’s birthday was coming up, and I didn’t have any good ideas on what to do. She’s always been really easy and low-maintenance, and I wanted to do something special for her. So I had an idea…if she was so excited about me maybe possibly seeing Lynn on the highway, what if he showed up at our door? He always seemed super nice and level-headed on the show, and also, I wanted to eat his plates.

Leveraging the internet as the superb stalking tool it is meant to be, I found his contact information and emailed him my unusual request. I didn’t hear from him for a couple of weeks and figured he put me in the Scary folder of his Inbox, but one day he did respond — and he said he would do it! I emailed him pictures of the girls and we arranged for him to show up at our house for my daughter’s birthday to teach her and her sister to cook a few dishes.

A few weeks later, while we were on our spring break staycation, we went to D Bar in Hillcrest for dessert.

I had this Poco Coco Loco, which was a panna cotta topped with a layer of tapioca, with a passion fruit compote, a passion fruit cloud and a macaroon. I might have shed a joyful tear in between bites.

Now, I knew from my online (let’s call them “research”) skills that Lynn had taken some of the photos on the D Bar website, and since he was due to show up to our house in a few weeks and since it had been some time since we had finished watching Season 4, I wanted to be sure the girls remembered him when he came over. So I asked, “Do you know who took the photos for the D Bar website?…Lynn! From MasterChef!”

The girls started whispering and giggling and then my younger one said, “And he’s right over there!!!”

And he was.

Which made me look like a total stalker.

After a few false starts my older daughter finally got up the guts to go talk to him, and he recognized her from the photos and said, “Oh hiiiiii….”. He turned to me and said, “Sandi, right?” at which point I could only wave like a girl on a parade float awkwardly trying to figure out how to keep this all a surprise for a few weeks later.

“Mom, do you know him?!?” daughter #2 asked, at which point I said, “No! Of course not!”

“Oooooh, I get it,” she said, “He recognizes you from the car!”

Ri-i-i-i-i-ght, I said, from the car! Because how could you not remember me if I maybe possibly saw you on the highway, right?

As it turns out, Lynn was with Shaun, another MasterChef contestant, who also happens to be a magician (and was in town for a magic convention)! So I guess you could say it was quite a magical evening as we were regaled with wizardry and sleight of hand. Lynn was delightful and answered all our incessant questions about his MasterChef experience and gave us tips on how to make macaroons.

The next day, of course, was spent watching MasterChef Season 4 episodes all over again.

Fast forward a few weeks to the birthday weekend. 2 PM, the doorbell rings, and we ask the birthday girl to open the door.

Lynn was perfectly charming with the kids and brought some amazing ingredients from Specialty Produce, like these beautiful basil flowers:

He got them started on prepping parsnips and taught them some proper knife skills.

They made a vinaigrette:

and learned the best way to juice a lemon to prevent the seeds from falling in:

They tasted as they went along:

and plated:

Here’s what they cooked up: first, a lovely heirloom tomato salad with red onion, basil and basil flower:

A side of roasted cauliflower:

And a rack of lamb, which was seared…

…then baked and served atop a parsnip puree, garnished with chive flower, alongside the colorful cauliflower and purple carrot medley:

And let me tell you, that lamb. I would fight you for that lamb.

Dessert was a mascarpone sorbet with raspberry coulis and coconut flakes:

I’m sorry it’s not totally in focus. I was concentrating on not eating it long enough to take the picture. Can you say so creamy that you want to die (in a good way)?

And as I licked the sorbet bowl clean while nobody was looking, Lynn packed up his knives and was off to his next gig…something involving sous-vide and a beer pairing for 50 people. Like a short rib-bearing Santa Claus. Thanks Lynn!

Cooking Food Popular

Vegan Coconut Chana Saag

I’m about as vegan as Fox News is liberal (I recently purchased a vegan leather jacket, because, how often do you find a jacket made of vegans?), but when I was killing time one day while my kids were at their riding lesson when I started reading a vegan cookbook. And it was fascinating. It was like cooking within a completely different universe. The fundamentals were different. It was like learning another language. Switching from PC to Mac. Learning to write with your navel. I’ll come up with the right analogy eventually.

And you know what? The dishes are beautiful. And flavorful. And most surprisingly (I always envisioned vegans as starving), filling.

This is the first recipe I tried. It was really quick, easy, and so flavorful. My carnivorous family loved it.

All you do is brown some onions in coconut oil:

And then add in everything else (spices, tomatoes and chickpeas). Cook it for about 10 minutes.

Stir in the kale and cook for another 5 minutes, and squeeze in some lime juice. Let it sit for 10 minutes and make sure you serve it with something like rice or flatbread to mop up all the vegan deliciousness of the sauce. Enjoy!

COCONUT CHANA SAAG from Isa Chandra Moskowitz’s Isa Does It

Ingredients

  • 2 TBSP refined coconut oil
  • 1 medium yellow onion, diced
  • 3 cloves garlic, minced
  • 2 TBSP minced fresh ginger
  • 2 TBSP mild curry powder
  • 1 tsp salt
  • Several pinches of freshly ground black pepper
  • 1/2 tsp anise seeds or crushed fennel seeds)
  • 1/4 tsp garam masala
  • 1/2 tsp ground cumin
  • 1/4 tsp cayenne
  • 1 24 oz can whole tomatoes
  • 2 15 oz cans chickpeas, rinsed and drained
  • 8 oz kale, chopped
  • 1 14 oz can regular or lite coconut milk
  • 2 TBSP fresh lime juice

Preparation

Preheat a 4 qt pot over medium heat and add the coconut oil. Saute the onion in teh oil for 5-7 minutes, until lightly browned.

Add the garlic and ginger and saute until fragrant, about 30 seconds. Add the curry powder, salt, pepper, anise seeds, garam masala, cumin, and cayenne and toss to coat the onions, letting the spices toast a bit (for a minute or so).

Add the tomato juice from the can, scraping the bottom of the pan to deglaze, simply hold the tomatoes and let the juice strain through your fingers. Now add the tomatoes from the can, squishing them with your fingers as you put them in the pot, to mash them up. Add the chickpeas and mix well.

Cover the pan and bring the heat up a bit. Let simmer for about 10 minutes, stirring occasionally. Add the kale and stir until wilted, then let simmer for 5 more minutes, uncovered, to cook it down even further.

Add the coconut milk adn heat through. Add the lime juice, then taste for seasoning. It tastes best if you let it sit for 10 minutes or so.

Serve over basmati rice with a little mango chutney and cilantro on top.

Cooking Food

Duck with Lavender Honey

It’s a (relatively) chilly December day, bright and sunny with just a bit of bite in the air — the So-Cal way of announcing winter. Though I don’t miss the long, cold winters in the east and midwest, in a place that gets nearly year-round summer, chill is a a bit of a novelty. It’s also the perfect weather for duck.

Crispy-skinned, savory and fatty, o how I love thee duck. What do I make for Thanksgiving? Duck. Christmas? Duck. Easter? You guessed it. Duck is the new black, people!

What I love about this recipe is that it requires very little hands-on time, which leaves more time for fun things like tabletop decor.

Don’t judge my wrinkled tablecloth. It’s too big and unwieldy to iron properly. I just dim the lights and serve wine which seems to take care of most of the wrinkles. And most other things in life, come to think of it.

I’ve been making this duck for about 13 years and I never tire of it. Hope you’ll love it as much as I do!

DUCK WITH LAVENDER HONEY adapted from Williams-Sonoma’s Savoring France

Ingredients

  • 4 tsp fresh lavender blossoms or 2 tsp dried blossoms
  • 4 tsp herbes de provence
  • 1 tsp fresh ground pepper
  • 1 1/2 tsp salt
  • 1 duck, about 5.5 lb
  • 4 TBSP lavender, acacia or other strong-flavored honey
  • 3 TBSP red wine

The day before:  Mix the spices and herbs together in a small bowl. Remove the giblets from the duck cavity, rinse the duck and pat it dry. Using a sharp knife, cut crisscrosses through the fat — but not into the meat — of the breast. Rub the duck inside and out with the herb mixture. Discard the neck. Let marinate overnight, or at least 3 hours.

Preheat oven to 350 degrees Fahrenheit.

Roast for 2 hours. Remove form the oven and pour off all but 1 TBSP of the collected fat from the pan (I reserve the fat and make french fries with it, but that is admittedly over the top!). Spread the duck breast with 2 TBSP of honey and return to the oven for another 10 minutes. Baste with pan juices, and roast another 10 minutes. Remove duck again and spread with the remaining 2 TBSP honey, and sprinkle with half the lavender blossoms. Roast for 10 minutes longer, then baste again with pan juices. Cook for another 5 minutes and remove form the oven.

Move the duck to a platter, cover the it loosely with aluminum foil, and let stand for 10 minutes while you prepare the sauce.

Put the roasting pan over medium heat and add the remaining lavender blossoms and the red wine. Deglaze the pan, stirring with a wodden spoon to remove any browned bits from the pan bottom. Cook until well blended and slightly reduced, 3-4 minutes. Keep warm.

Carve the duck, place on a platter, drizzle with sauce and serve immediately.

Serves 2-4.


Cooking Food Travel

Whole Trout en Papillote

It’s finally the end of the week and I’m feeling like the fish above. He’s all, “Girl, my terrariums are all dessicated and don’t even talk to me about my hair, so I’m just going to lie down in a bed of butter and lemons now.” Am I projecting?

I got back from another business trip to London a couple of weeks ago. Every morning I ran in the mist like a gorilla, which is my favorite weather and method to run in.

Across the bridge:

along the River Thames:

past Big Ben:

and on the first day, accidentally across a finish line amidst a cheering crowd in #theonlyraceilleverwin. Not to worry, the glory didn’t last long because the very next day some piece of cobblestone tripped me into some major Crouching Tiger-style flying and rolling on the ground resulting in this (and yes, as a friend so generously pointed out, I managed to land on the tops of my knees. And don’t judge my skin.):

It wasn’t like I was very noticeable wearing hot pink running shoes, a purple running skirt and a fuschia jacket or anything. I always said that exercise was dangerous.

Later, I did manage to make it to a pop-up restaurant in SoHo called The Full English, and felt much better after stuffing myself with bacon, eggs, tomatoes and beans. Check it out if you’re in London.

So that was London. Now on to fish.

Trout is one of my favorite fish, and what  I love about fish (aside from the brain health benefits that I so desperately need) is the speed with which you can prepare it. I’m not terribly experienced with cooking whole fish, so I used this Whole Trout en Papilotte recipe from the Food Network. Place some chopped onion on a piece of parchment paper, lay the fish on top and cut slits into it. Season it inside and out with salt and pepper.

Stuff the fish with herbs, coat the top with shallot butter (see instructions below) and cover it with a layer of lemons.

I wrapped it in the parchment, grilled it for 20 minutes, and it was done! Moist, tender, and makes you smarter!

WHOLE TROUT EN PAPILLOTE (from Food Network)

Ingredients

  • 2 whole trout, dressed
  • Salt and pepper
  • 1/2 cup sliced sweet yellow onion
  • 2 handfuls fresh herbs (thyme, parsley and rosemary)
  • 3 tablespoons lemon-shallot butter, recipe follows
  • 1 lemon, sliced
  • 2 tablespoons dry white wine
  • 1 tablespoon extra-virgin olive oil
  • Parchment paper

Preparation

Preheat oven to 400 degrees (I used a grill — either will work!). Cut 2 sheets of parchment paper large enough to completely cover the fish when folded. Wash and dry the trout. Using a knife, score the fish on 1 side by cutting slits into the flesh just until you feel the bone. Season the trout generously, inside and out with salt and pepper. Spread 1/4 cup of the onions on each sheet of parchment. Place fish on top, scored side up. Stuff the inside of the fish with herbs. (It’s ok if they stick out a bit). Top each fish with 1 1/2 tablespoons of the shallot butter. Cover with the lemon slices. Drizzle 1 tablespoon white wine and 1/2 tablespoon olive oil over each fish. Fold the parchment over the fish. Starting at 1 end, fold the paper on itself, making sure to completely seal it. At the end, fold it underneath itself. Repeat. Place fish on large baking sheet and cook for about 12 to 15 minutes. To serve, place trout en papillote on a platter. Cut the parchment at the table to ensure that all the aromas stay inside the package.

Lemon Shallot Butter

Ingredients

  • 1 stick unsalted butter, softened
  • 1 lemon, zest finely minced
  • 1 small shallot, finely minced
  • Salt and pepper

Preparation

In a food processor, combine all ingredients until mixed. Place whipped butter mixture onto a sheet of plastic wrap and roll into a log. Freeze until ready to use. Butter will keep in the freezer for at least a month.