Raise your hand if you rang in the new year with the flu. OK, put it down because that probably hurt if you’re sick. It seriously feels like everyone has the flu. We had it on a 38-hour journey back from Africa, and if you’ve ever wondered what hell is actually like, fly with the flu while watching the sky map on the monitor move less than one pixel per minute. And then have your daughter puke in the car ride on the way home. Happy new year!
Ok, I can’t really complain though because we were on safari in Africa, and — lion cubs. More on my Instagram account.
I’m only starting to feel half human at this point, so I’m going to keep this short, and write it on a blog so that I don’t have to use my actual mouth. Everyone knows that there’s nothing better (except maybe Tamiflu) to have on hand than chicken soup when you’re feeling like crap. But not everyone has a mom in the house that can make it for them. All the prep for this can be done while sitting; you throw it in the pot, and walk away. I use an Instant Pot pressure cooker (because I use it for everything nowadays), but you can also just put it on the stovetop on simmer for an hour and a half or so, til the chicken’s tender. Either way!
INSTANT POT CHICKEN SOUP FOR FLU
Ingredients
4 chicken drumsticks or bone-in thighs
2 tomatoes (I used Roma)
6 carrots chopped and peeled
3 ribs celery, cut into 1/2 in pieces
2 cloves garlic
1 diced onion
10 cups water
Two 1/4 inch slices ginger
1.5 TBSP salt or to taste
(if available): one date
Instructions
Put in pot. Set to manual pressure 30 minutes. Go lie down or moan in misery.
When cycle is complete, release pressure. Take out chicken and put on plate; with two forks, pull the meat off the bone and put back into the pot. Eat alone or add in cooked rice or noodles for extra bulk.
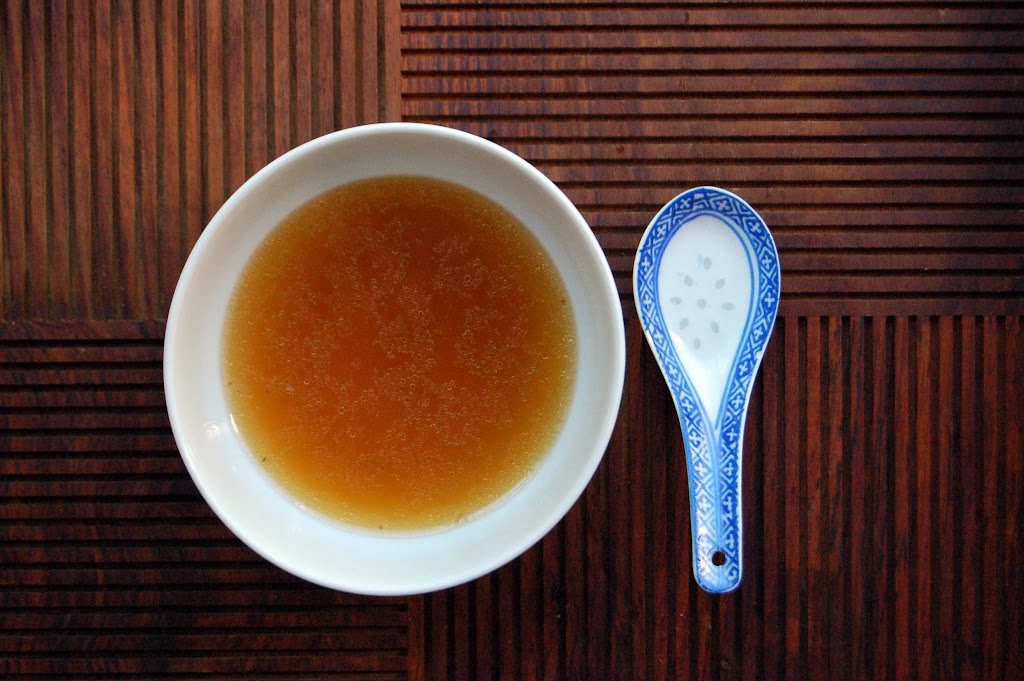
Every once in a while, things I grew up with in my Chinese-American household manage to become the latest craze. Supplementary math books, growth mindset, and now: bone broth.
I’ve read tales of people queuing for these magical cups of inflammation-reducing, hair-skin-and-nail-enhancing elixir. While those appear to be attractive benefits of drinking broth, there’s another good reason to give it a try: it tastes really good. And after I have broth, I feel really good.
I’ve been drinking a lot of broth lately because I have a bum knee. For years, running has been my outlet for stress and my ticket to a decent night’s sleep, but years of aggressively pounding on concrete is finally catching up with me. I’ve had pain off and on for a couple of years now, but I really can’t run without pain anymore, and now it’s starting to hurt sometimes when I walk (never mind the gross popping sound it’s making now too). I’m seeing a doctor tomorrow, but for now, broth tides me over.
Sipping broth is a spiritual experience. It feels to me like serenity and replenishment. In our crazy lives there are so few things in life that we can control, so when there are opportunities to create serenity — in my case, like buying a really quiet dishwasher and oven. Broth is way cheaper than either of those!
My daughter made an Asian-style broth in a slow cooker; check out the video below to find out how!
SLOW-COOKER BONE BROTH
Ingredients
1-2 pounds of bones (I like to use a mix of bone types, like chicken and pork; make sure you have a mix of meaty bones and bones with tendon and cartilage, so you get both flavor and collagen into your broth. I save my bones from roasts in the freezer for when I’m ready to make broth.)
1 whole onion, peeled and cut in half
1 head of garlic, cut in half horizontally
1 TSBP whole ginger root
1 cup shitake mushrooms
1 TBSP vegetable oil
Water
Heat the vegetable oil in a saute pan and sear the onion and garlic til browned. Keep them in big chunks as cut so they’re easier to fish out after cooking. Add to slow cooker. Add in bones, ginger and mushrooms, and fill the slow cooker pot with water until just 1 inch below the upper rim.
Cook for 1 hour on high and then 15-23 hours on low. Occasionally skim fat and other matter that floats to the top off the surface of the broth (I find that when I use bones from previous roasts, there’s very little cloudiness to the broth and you don’t have to worry about skimming much. I also prefer the flavor from pre-roasted bones).
Take out the solids (or pour the liquid through a strainer into a large bowl), season with salt as desired, and enjoy! If you want to keep an ongoing broth factory, just keep adding water, bones and veggies (feel free to experiment!) to leftover broth and cook — the flavor will become more complex over time.
I don’t know about you, but I’m pining for summer. We had a lovely, temperate summer here in San Diego and have been suffering through a heat wave for the past couple of weeks. Suffering, I say! Because we San Diegans cannot stand temperature fluctuations greater than +/- 3 degrees.
How was summer for you? It was my first summer in my new life as an independent consultant, which meant that I got to do interesting work, but was still able to take the odd day off and spend a day at the beach with the girls. I’m loving this gig; it’s a privileged position to able to choose the work that I take on, and it helps me with setting boundaries — something I’ve never really been very good at doing.
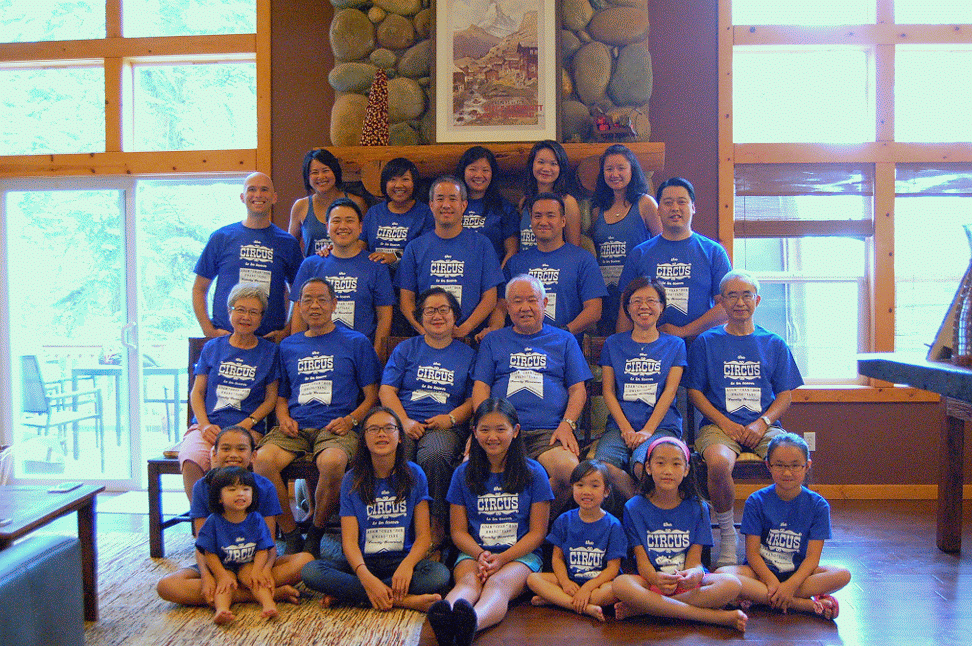
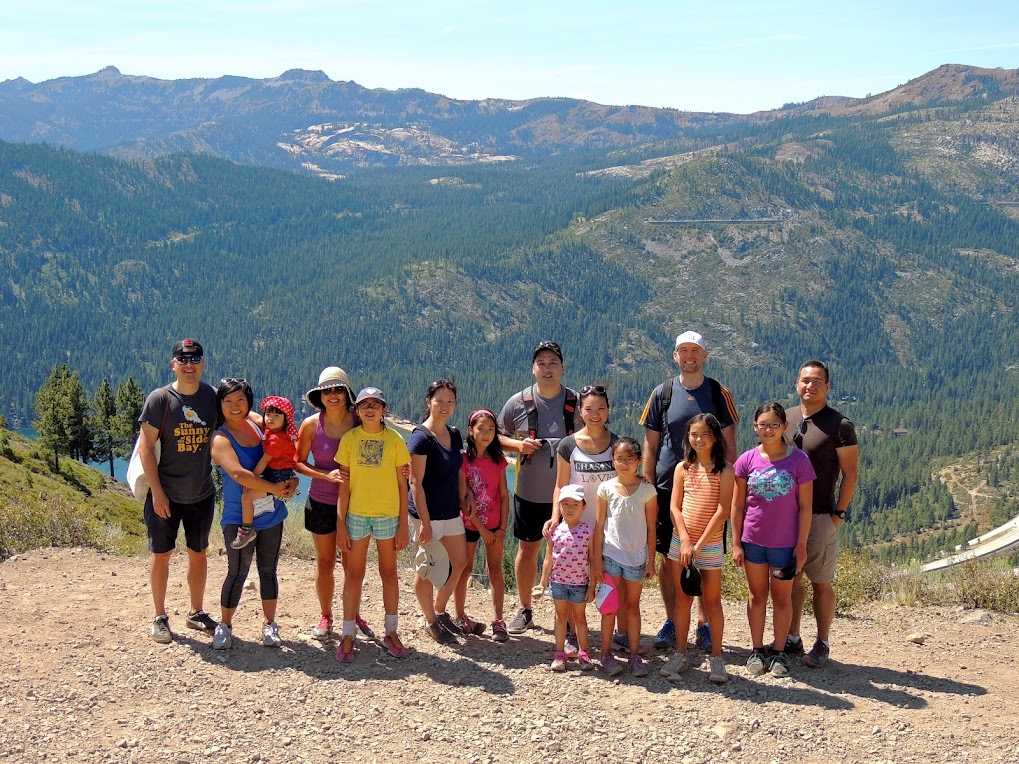
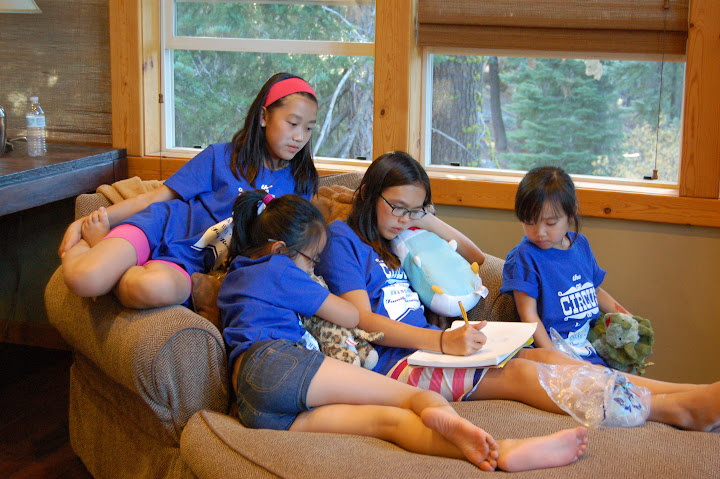
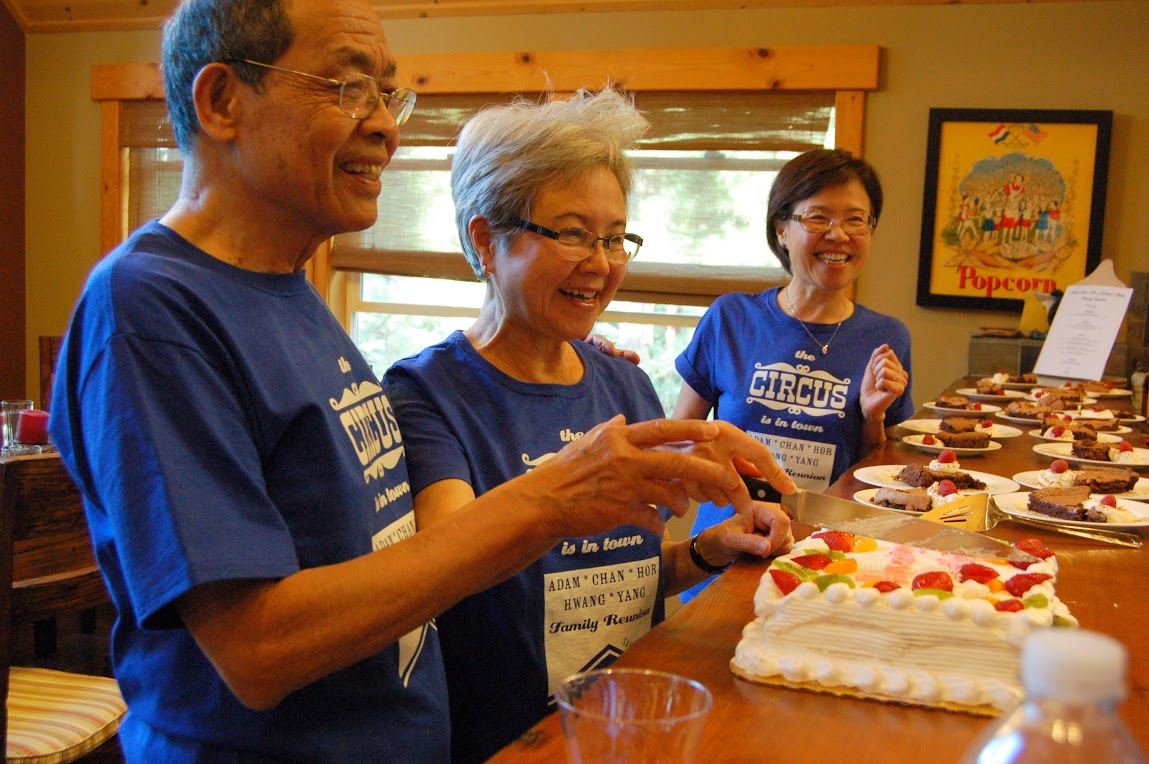
Our big trip of the summer was up to Lake Tahoe, where we had a family reunion with three generations of family from my mom’s side. My mom had 9 kids in her family, so when we have whole-family get-togethers, we usually take up a whole restaurant. This was a scaled-back gathering of the family that’s living the in the United States.
A lively bunch, they are.
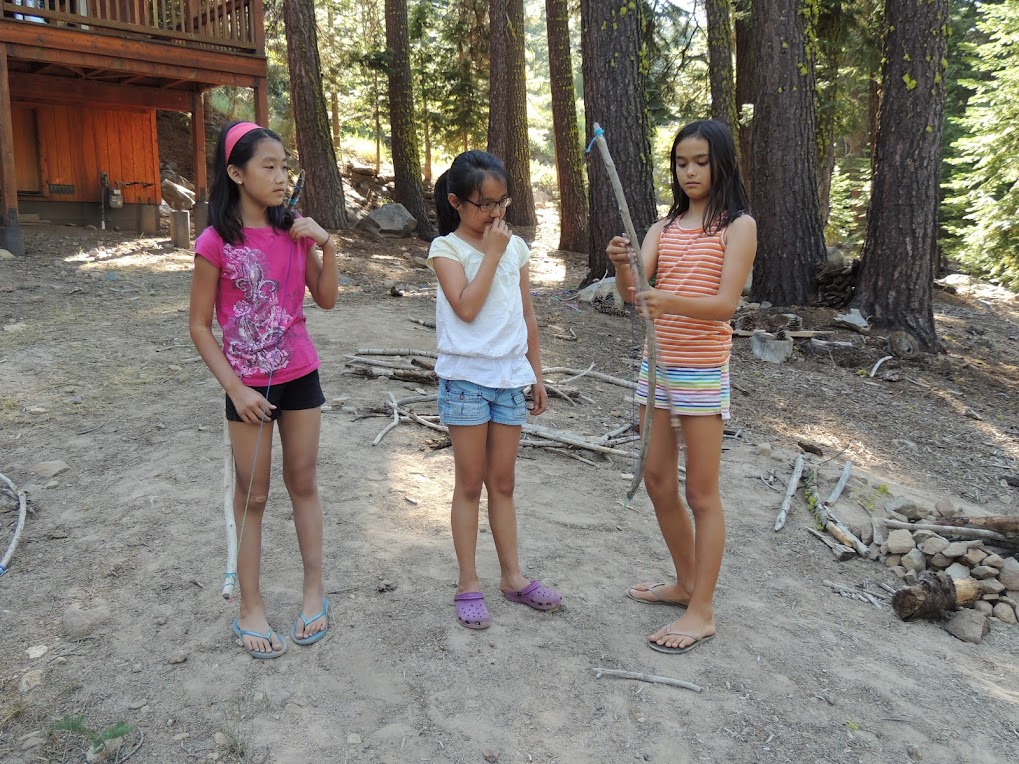
The kids got to do what kids do…you know, making weapons out of sticks…
…and so on…
The lake was nothing short of amazing. Amazing! Clear! Sparkly! Here I am having one of the happiest moments ever, on a paddle board in the middle of this incredible view (photo credit to my cousin Jack!):
Plenty of kayaking and boating to go around too.
And some of us did some tree climbing on a ropes course:
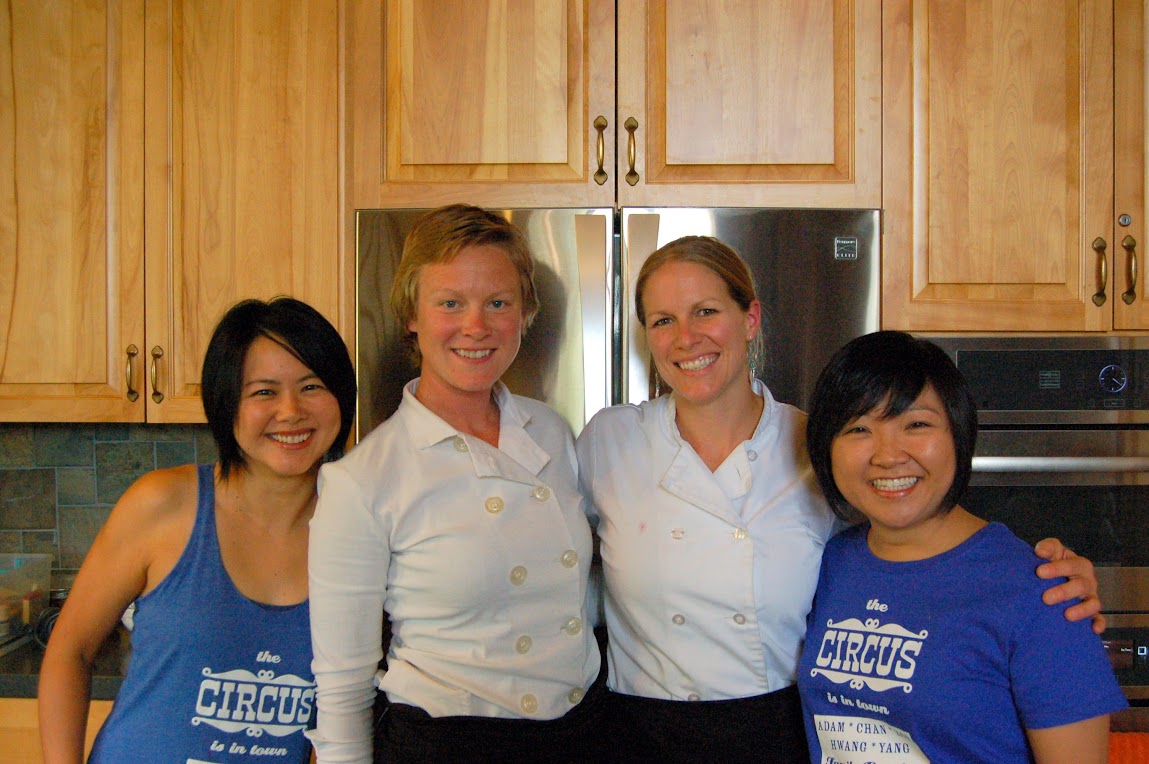
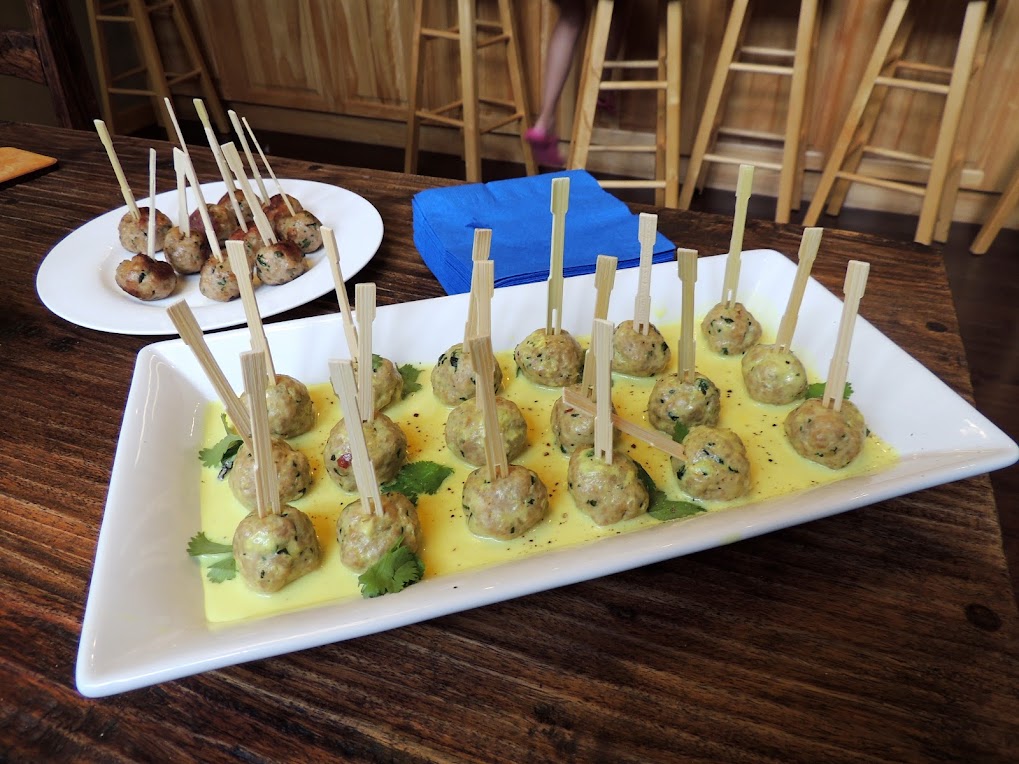
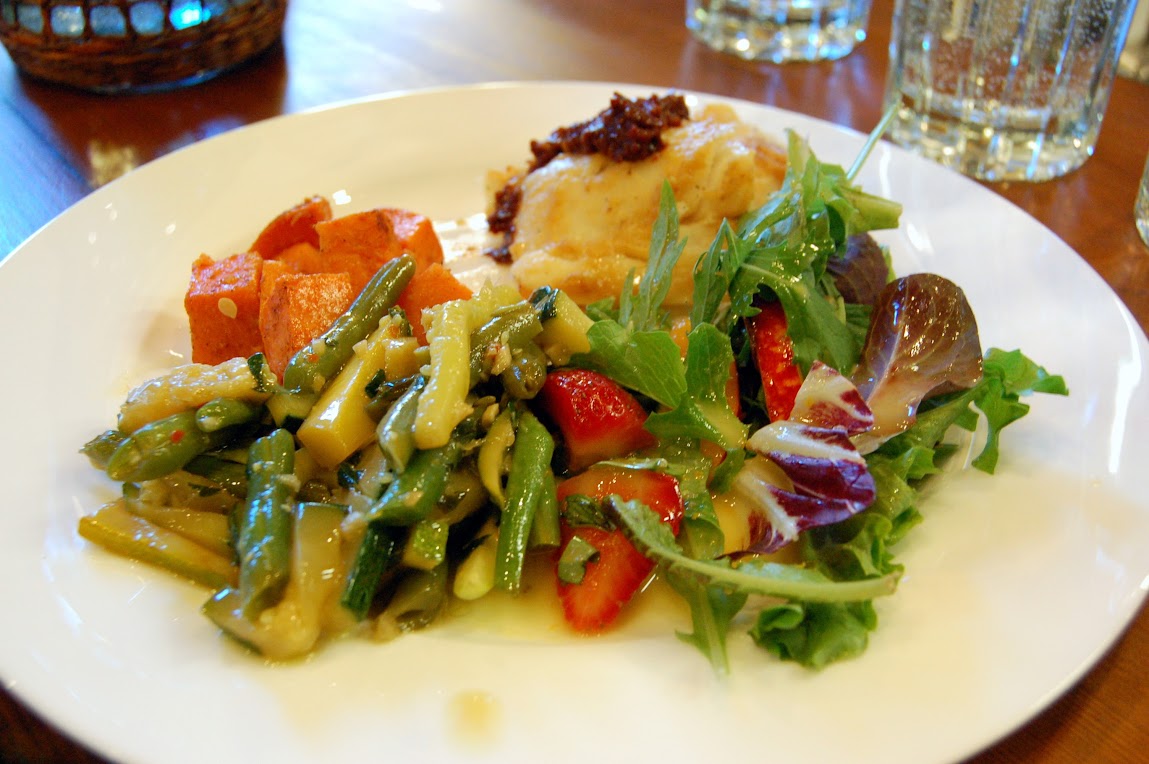
The best thing we did (thanks to the spectacular organization skills of my sister-in-law) was to hire a private chef — Arica from Yummy Fixins — who was soooooooo fantastic. Not only was her food spectacular, but she and her assistant cleaned the kitchen before and after! If you are in Tahoe, it would simply be wrong not to hire Arica.
See those flourless chocolate cake slices in the back? I would fight you for them! The BEST I have ever tasted.
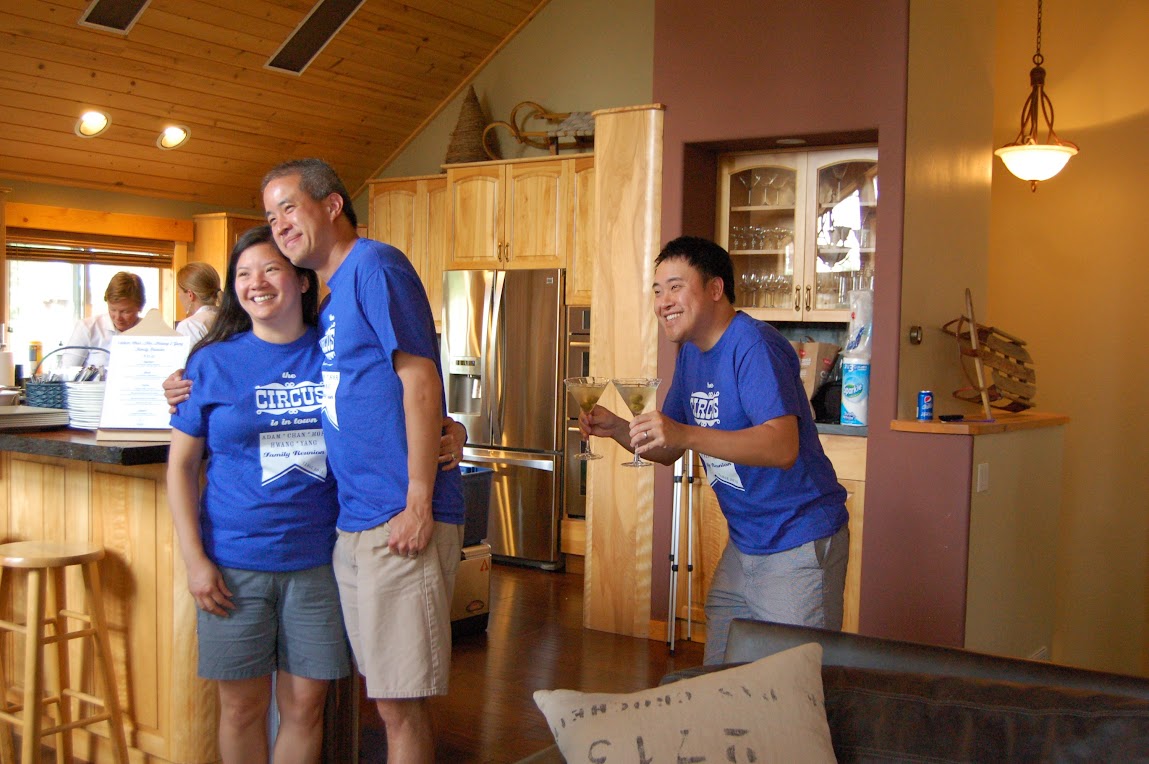
My brother was in charge of martini-making and photo bombing:
My cousins and I used to spend summers together hanging out, torturing one another and generally engaging in what is most accurately described as nonsense, so it was great to have an opportunity to gather us from all the corner of the country to do this all over again, across three generations.
After the reunion, we made our way back down the California coast. If I am ever a cow, please make me a Big Sur cow. They have the most amazing views.
I’ll do a roundup of the coastline drive in another post, but that’s just a taster…isn’t it lovely?
Ah, thanks for allowing me to relive one of the highlights of summer. And now, back to real life. The kids are back in school, we’ve got multiple Google Calendar carpools going on, and a middle school kid in the mix. Our mornings are rushed and the easiest meals are often cereal, so that’s the go-to for the kids.
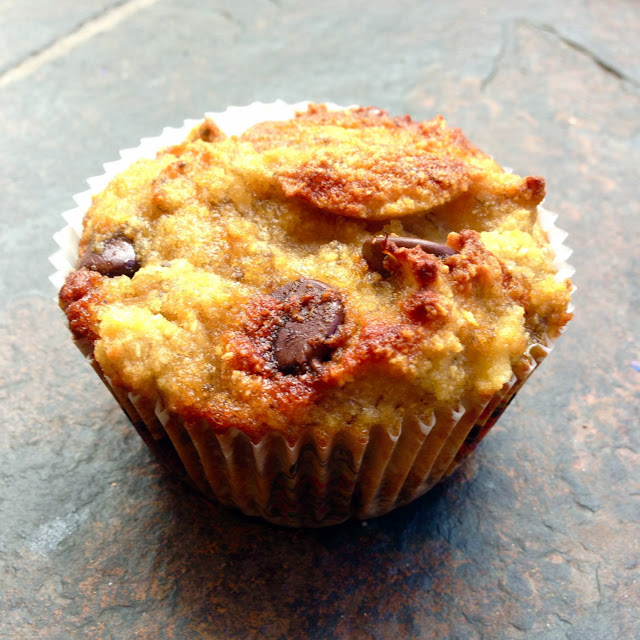
I’ve been adding these gluten-free banana chocolate muffins into the repertoire lately. Now, we all know that I’ve got nothing against gluten, being that I bake my own bread. But these are so easy to make, don’t require a ton of ingredients, and they always, always come out moist. We’ve made a little video below, with the full recipe under the video. Hope you enjoy these — cheers!
GLUTEN-FREE BANANA CHOCOLATE MUFFINS
Ingredients
¾ cup coconut flour
6 eggs
3 ripe bananas, mashed
½ cup raw honey, at room temperature
¼ cup melted coconut oil
1 teaspoon vanilla extract
1 teaspoon baking soda
1 teaspoon chia seeds
¼ teaspoon salt
1/2 cup semi-sweet chocolate chips
Preparation
Preheat the oven to 350F and line a standard muffin tin with 12 baking cups.
In a large mixing bowl, combine the all ingredients except for chocolate chips. Use a spatula to mix well; then fold in the chocolate chips.
Divide the batter among the 12 cups, then bake at 350F for 23-25 minutes, until the edges are golden the centers of the muffins feel firm to a light touch. Allow the muffins to cool for at least 20 minutes before serving.
Store these in the fridge if not eating immediately.
Someone (who I used to work with and who used a gaming headset for work and once embarked on gathering customer feedback unknowingly calling people using the “space chipmunk” voice setting on his headset) shared with me what I am sure is the 8th wonder of the world.
Go into Google Hangouts and type in /ponystream . Go on, I’ll wait.
Welcome to your changed life! Maybe My Little Pony isn’t as big a deal at your house as it is in mine, but it takes up a lot of bandwidth over here. One of my kids has a Fiverr business where she will draw you in My Little Pony style as well as a YouTube channel dedicated to pony drawing.
Now that it’s summer we’re spending more time at the beach, but My Little Pony is always with us.
Plus a little beach volleyball.
And the other great thing about summer? Stone fruits. Loquats, peaches, apricots, nectarines…so sweetly wonderful right now.
You could just eat them raw. You wouldn’t be sorry.
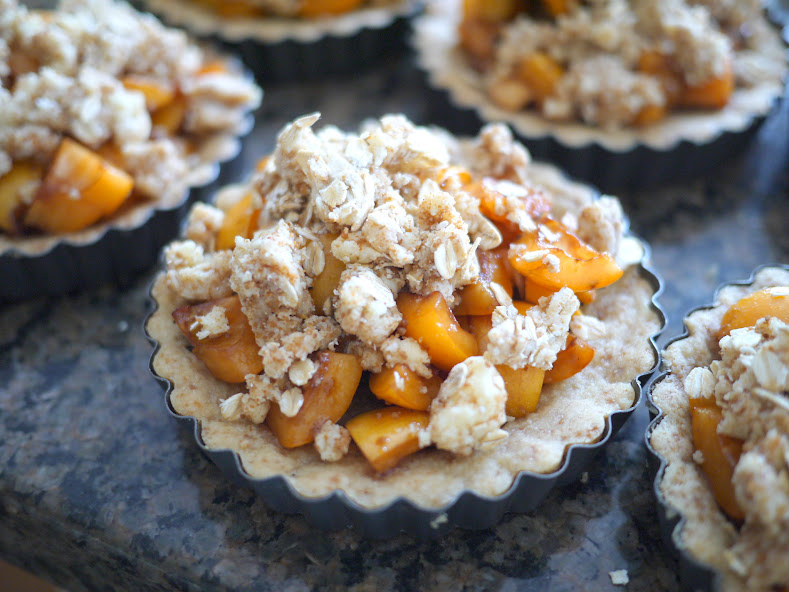
But maybe sometimes you want get a little fancy. Feel a bit like the queen. For that, you should make a tartlet.
We got these tartlet pans for our wedding 14 years ago and I finally thought NOW IS THE TIME. I only really make simple recipes, so this is what I did.
STONE FRUIT TARTLET
Makes 6 4-inch tartlets.
Ingredients
Filling
3 cups of pitted stone fruit, such as peach, loquat, or nectarine, chopped
1/2 cup coconut palm sugar
3/4 cup flour
1/2 cup unsalted butter, chilled and cut into pieces
1 cup rolled oats
Crust
2 cups flour
1/2 cup coconut palm sugar
1 cup butter
Preparation
Preheat the oven to 350 F.
Crust: Mix the flour, palm sugar and butter with an electric mixer til crumbly, about 2 minutes. Press the mixture into six 4-inch tartlet pans, so that it’s about 1/4 inch thick. Bake for about 20 minutes, checking frequently after 10 minutes, til the crust is lightly browned.
Filling: While the crusts cool, raise the oven temperature to 400 F. Toss the stone fruits in a large bowl with 1/4 cup of the palm sugar and 1/4 cup of flour. Spoon the mixture onto the tartlet crusts.
Put the remaining flour and butter into a food processor and pulse until the clumps are about the size of a pea. Add in the remaining palm sugar and rolled oats and pulse to combine. Press the mixture over the stone fruits.
Bake until the stone fruits are tender and the topping is a golden brown. Serve with whipped cream or ice cream if desired.
I am mobile blogging to you today from beautiful Torrey Pines State Reserve!
I decided to rely on my middle-aged brain instead of checking my calendar, so have arrived an hour early to meet a friend and still have time to kill after forcing myself to do a run. So mobile blogging!
Ok, timely info: it’s almost Mother’s Day, and I don’t know about you, but my mom is a big fan of saving money. Rejoice: my friends over at OpenTable let me know that you can enter to win one of 10 $150 restaurant gift cards! I entered of course, and I think you should too. Here’s the link; if you win, I also think that you should invite me, even if it’s not technically in OpenTable’s contest rules.
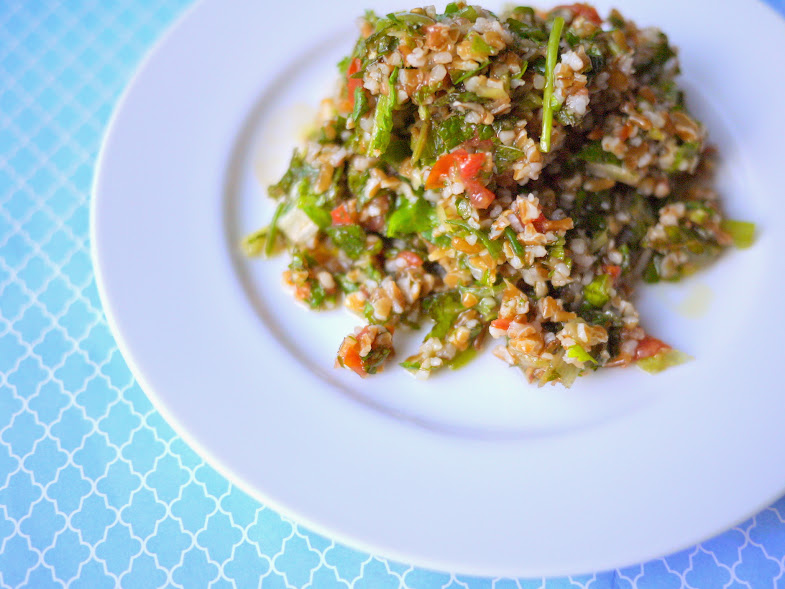
Now, next in the series on foods that are as much fun to say as they are to eat: tabbouleh! I love tabbouleh, and so does my younger kid — we just love the awesome texture of the bulghur wheat couples with the tangy goodness of lemon juice and the party that mint and scallions bring to the table.
Tabbouleh is also super easy to make. Here, my apprentice shows you how. It’s a fantastic make-ahead option too — tastes even better if you give the flavors time to develop.
11/2 large bunches parsley (about 11/2 cups chopped)
1 bunch mint (about 1/3 cup chopped)
1 bunch scallions, white and green parts (about 1 cup chopped)
2 ripe medium tomatoes, cored and diced small
Juice of 1 lemon
Salt
1/4 cup extra-virgin olive oil
Preparation
To prepare bulgur: Place bulgur in bowl. Alice says to add cold water to cover by 1 inch, but I add boiling water — I like the tabbouleh a little softer. Soak for 20 minutes or until grains are plump. Drain in sieve.
To mix salad: Meanwhile, in large bowl, combine parsley, mint, scallions and tomatoes. Using hands, squeeze soaked bulgur to remove as much water as possible. Mix bulgur into chopped herbs and tomatoes. Add lemon juice, salt and olive oil. Mix well. Taste and add more salt, lemon juice or oil if needed. Let rest for 1 hour before serving to allow bulgur to absorb flavors.
Since December, I’ve been spending a disproportionate amount of time in sweatpants. Factors driving this behavior:
They are the symbol of freedom.
Nothing beats an elastic waistband when you’re eating. NOTHING.
This is the year of the cute sweatpant (or, jogger, as it’s been rebranded). There are the printed type, which I like in concept but which always look like pajamas on me (probably because I refuse to wear heels with them, which I feel defeat the purpose of achieving ultimate comfort), and the solid type; these from Athleta are my all-time favorites (I got them for Christmas — thanks San-do-ra!).
I left my executive job and am now consulting, mostly from home. I was just finding that even when I was at home, I was never mentally available to my family…I have a real problem compartmentalizing work (plus there were the weird hours and challenges of working in an international business). It’s been a lot easier now that I’m in full control of my work and time…and plus I can wear sweatpants.
There are, of course downsides to the exclusive wearing of elastic waistbands. The other night I went out to dinner for a friend’s birthday, and, as it was at a restaurant, I thought the occasion warranted pants (and not the elastic waistband kind that is made to mimic pants, which I have — but the real kind with a zipper and button and everything). Turns out if you move into real pants after weeks of wearing joggers, you have to go to the bathroom every 20 minutes from the extra pressure. Also, you may find yourself thinking things like, “Why should I have a separate wardrobe for sleeping?” Still, a small price to pay for the otherwise boundless joy.
While I was sitting around in my sweatpants over the holidays, we had visitors. My brother and his family came to visit. The girls had so much fun with their little cousin, who is a big fan of hats.
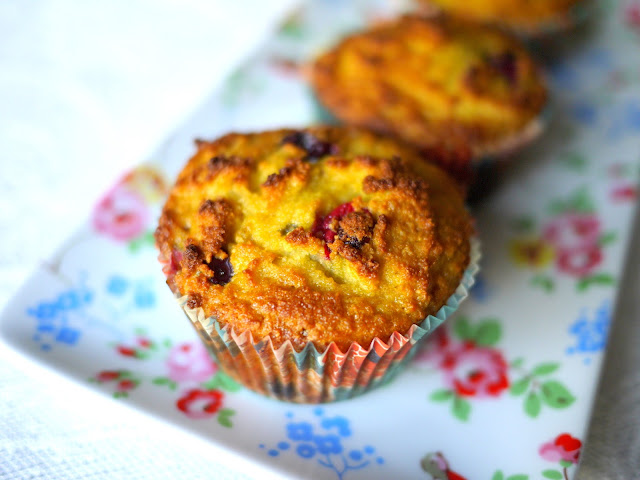
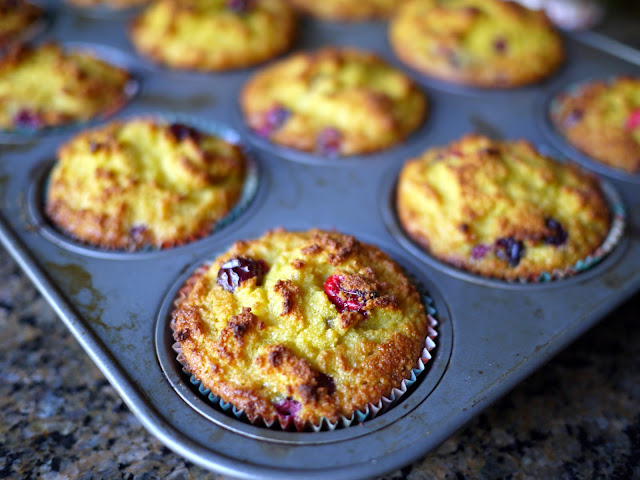
My brother has a gluten intolerance, and since I also had a friend visiting that week with celiac disease, I thought I’d try to make some gluten-free muffins (which also happen to be naturally sweetened) from paleo blogger Detoxinista. I added shredded coconut and chia seeds for some extra crunch and texture. I had pretty low expectations since most gluten-free baked goods I’ve seen looked kind of flat and generally unappetizing, but these orange cranberry guys puffed up nicely:
And, they were nice and moist. I’ve tried this recipe with a number of variations, and you can pretty much add in any combination of flavors and arrive at a nice paleo muffin.
My favorite part about the recipe — it’s a one-bowl wonder. Just throw everything into a bowl, mix it up, pour into muffin tins and bake! Leave me a comment if you try a different variation — I’d love to know about any winners!
PALEO GLUTEN-FREE ORANGE CRANBERRY MUFFINS
adapted from Detoxinista
Ingredients
¾ cup coconut flour
6 eggs
½ cup orange juice
Zest of one orange (about 2 teaspoons)
½ cup pure maple syrup or raw honey, at room temperature
¼ cup melted coconut oil
1 teaspoon vanilla extract
1 teaspoon baking soda
1 teaspoon chia seeds
¼ teaspoon salt
1 cup fresh cranberries
1/4 cup shredded coconut
Preparation
Preheat the oven to 350F and line a standard muffin tin with 12 baking cups.
In a large mixing bowl, combine the coconut flour, eggs, orange juice, zest, maple syrup, coconut oil, vanilla, baking soda, chia seeds and salt. Use a whisk to mix well, breaking up any clumps, then fold in the fresh cranberries and the shredded coconut.
Divide the batter among the 12 cups, then bake at 350F for 23-25 minutes, until the edges are golden the centers of the muffins feel firm to a light touch. Allow the muffins to cool for at least 20 minutes before serving.
Since these muffins are very moist, leftovers should be stored in the fridge for best shelf life, but bring them to room temperature again before serving for best flavor and texture.
I am currently in that circle of hell reserved for people who blog about food but cannot eat it. I’ve had some kind of stomach virus (I think. Or it could be worms. That is exactly what I need. Worms.) since last weekend and though I hadn’t been hungry all week, I am very hungry now but the stomach is not accepting donations.
I’ve generally been feeling weird lately, and part of it I attribute to aging. I can’t remember anything anymore. I recently went away on a girls’ weekend (which, sadly, ended at some point) and the whole weekend was full of conversations like:
“So I have a friend that lives in…African country! Abject poverty! Blood diamonds!”
“The Congo?”
“Right! This is just like that game…shouting out clues! Have to guess the word! Board game!”
My friends and I, we are losin’ it. But the good news is that soon we won’t remember to care.
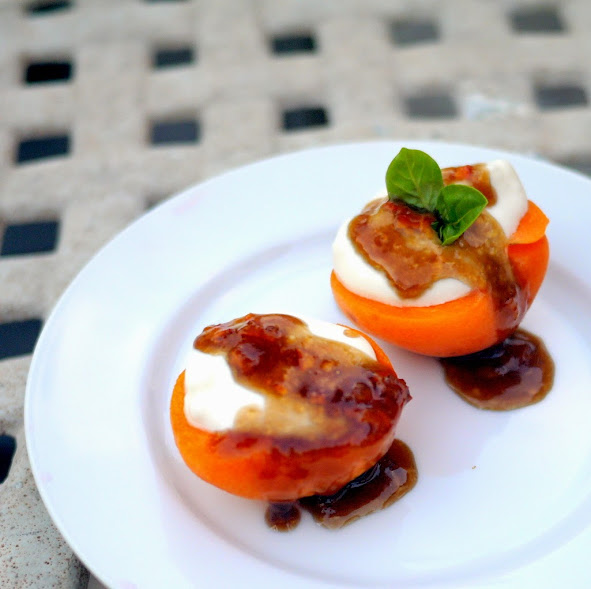
The other good news is that it’s apricot season. Apricots just look so…peachy to me — like a teenaged girl with good skin (I would never know what that’s like). I got a box of apricots from my CSA and made this dessert which I promise may be the best thing I’ve ever tasted (it’s large category, that.). Seriously though it is incredibly awesome, like as awesome as if your tongue were a skating rink and Olympic skaters were winning the gold medal on it.
Some incredibly gifted person named Miki posted this on Allrecipes but I modified it a bit to add a bit of citrus and floral aromas, substituting lemon curd for apricot nectar, marmalade for apricot preserves and using a violet flavored balsamic vinegar .
APRICOTS WITH MASCARPONE CREAM adapted from Allrecipes
Ingredients
3 TBSP sugar
4 oz mascarpone cheese
2 TBSP lemon curd
1/2 tsp vanilla extract
1 pinch ground cardamom
3 TBSP marmalade
1/4 cup honey
1 TBSP balsamic vinegar (I used violet flavored vinegar)
8 fresh apricots, pitted and halved
Preparation
Beat the cream in a chilled bowl with an electric mixer until soft peaks form. Beat in the sugar and set aside. In another bowl, whip the mascarpone cheese with an electric mixer until very soft; beat in the lemon curd, vanilla extract, and cardamom. Gently fold the mascarpone mixture into the whipped cream.
Place the marmalade and honey into a microwave-safe bowl and heat in microwave oven until warm but not hot, about 30 seconds. Mix well and stir the balsamic vinegar into the honey mixture.
Stuff each apricot half with a dollop of the mascarpone cream and place the filled apricot halves on a serving dish. Drizzle the fruit and plate with balsamic sauce and serve.
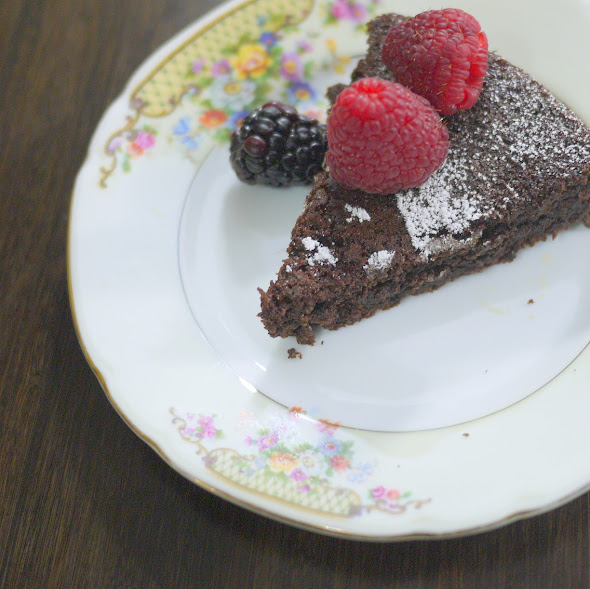
The world is awash today with images of hearts and chocolate. Happy Valentine’s Day, friends. I know what you’re thinking. Chocolate, hearts, berries…but what’s Valentine’s Day without quinoa? I hear you, ye tired, hungry and gluten-free. Because having quinoa in your cake is like having dinner together with dessert. It’s just more efficient.
I happened upon this recipe at the Week of Menus blog. She must cook during the day because she has way better lighting than I do, and is reflecting on how to be a better mother while I am just thinking about my hair and thinking about how I can make dinner into a dessert. (I cut my hair. After a couple of weeks of awkward silences and people averting my gaze trying not to comment on it while I was figuring out how to work with it, I have finally found a way to make it look effortlessly tousled which requires way more time than if I tried to make it look like I made a concerted effort. But such is the price of beachy.)
Week of Menus has done a good job laying out the recipe, so I’ll just link to it below, but the basic gist is that you mix the quinoa in a blender with a bunch of stuff and end up with a batter that looks like this:
Bake it like she tells you to. I’m sorry, but making my hair look effortlessly tousled has drained me of my will to share detail. You’ll end up with a cake.
Then you can cut a heart out of wax paper, snowflake-style:
Place it over the cake and dust the top of the cake with powdered sugar:
I’m about as vegan as Fox News is liberal (I recently purchased a vegan leather jacket, because, how often do you find a jacket made of vegans?), but when I was killing time one day while my kids were at their riding lesson when I started reading a vegan cookbook. And it was fascinating. It was like cooking within a completely different universe. The fundamentals were different. It was like learning another language. Switching from PC to Mac. Learning to write with your navel. I’ll come up with the right analogy eventually.
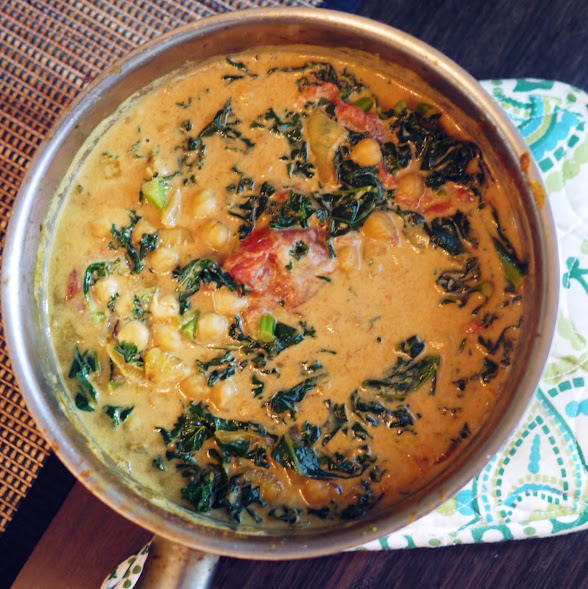
And you know what? The dishes are beautiful. And flavorful. And most surprisingly (I always envisioned vegans as starving), filling.
This is the first recipe I tried. It was really quick, easy, and so flavorful. My carnivorous family loved it.
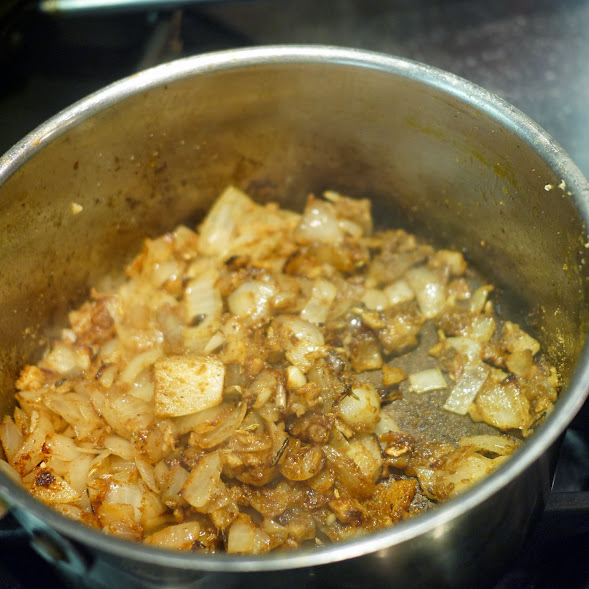
All you do is brown some onions in coconut oil:
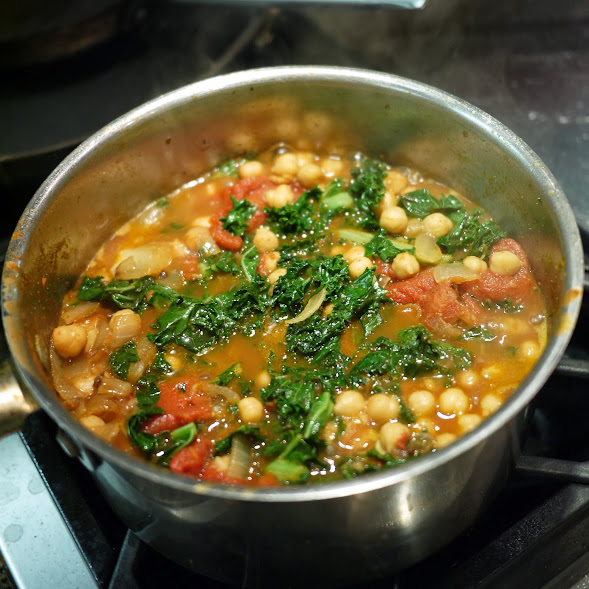
And then add in everything else (spices, tomatoes and chickpeas). Cook it for about 10 minutes.
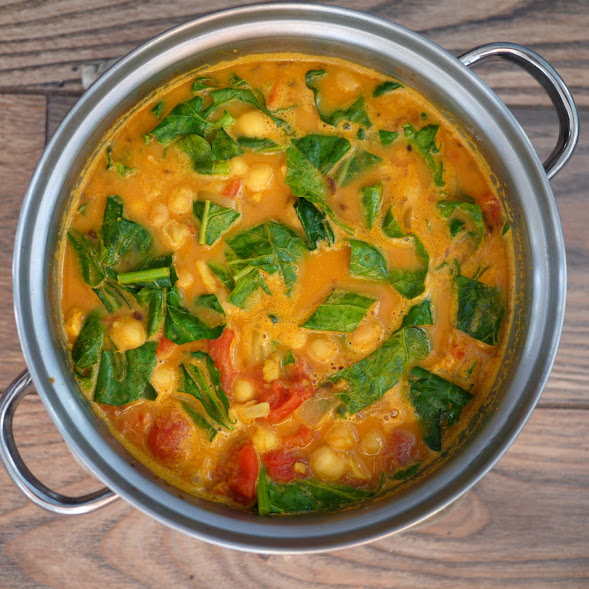
Stir in the kale and cook for another 5 minutes, and squeeze in some lime juice. Let it sit for 10 minutes and make sure you serve it with something like rice or flatbread to mop up all the vegan deliciousness of the sauce. Enjoy!
COCONUT CHANA SAAG from Isa Chandra Moskowitz’s Isa Does It
Ingredients
2 TBSP refined coconut oil
1 medium yellow onion, diced
3 cloves garlic, minced
2 TBSP minced fresh ginger
2 TBSP mild curry powder
1 tsp salt
Several pinches of freshly ground black pepper
1/2 tsp anise seeds or crushed fennel seeds)
1/4 tsp garam masala
1/2 tsp ground cumin
1/4 tsp cayenne
1 24 oz can whole tomatoes
2 15 oz cans chickpeas, rinsed and drained
8 oz kale, chopped
1 14 oz can regular or lite coconut milk
2 TBSP fresh lime juice
Preparation
Preheat a 4 qt pot over medium heat and add the coconut oil. Saute the onion in teh oil for 5-7 minutes, until lightly browned.
Add the garlic and ginger and saute until fragrant, about 30 seconds. Add the curry powder, salt, pepper, anise seeds, garam masala, cumin, and cayenne and toss to coat the onions, letting the spices toast a bit (for a minute or so).
Add the tomato juice from the can, scraping the bottom of the pan to deglaze, simply hold the tomatoes and let the juice strain through your fingers. Now add the tomatoes from the can, squishing them with your fingers as you put them in the pot, to mash them up. Add the chickpeas and mix well.
Cover the pan and bring the heat up a bit. Let simmer for about 10 minutes, stirring occasionally. Add the kale and stir until wilted, then let simmer for 5 more minutes, uncovered, to cook it down even further.
Add the coconut milk adn heat through. Add the lime juice, then taste for seasoning. It tastes best if you let it sit for 10 minutes or so.
Serve over basmati rice with a little mango chutney and cilantro on top.
It’s a (relatively) chilly December day, bright and sunny with just a bit of bite in the air — the So-Cal way of announcing winter. Though I don’t miss the long, cold winters in the east and midwest, in a place that gets nearly year-round summer, chill is a a bit of a novelty. It’s also the perfect weather for duck.
Crispy-skinned, savory and fatty, o how I love thee duck. What do I make for Thanksgiving? Duck. Christmas? Duck. Easter? You guessed it. Duck is the new black, people!
What I love about this recipe is that it requires very little hands-on time, which leaves more time for fun things like tabletop decor.
Don’t judge my wrinkled tablecloth. It’s too big and unwieldy to iron properly. I just dim the lights and serve wine which seems to take care of most of the wrinkles. And most other things in life, come to think of it.
I’ve been making this duck for about 13 years and I never tire of it. Hope you’ll love it as much as I do!
DUCK WITH LAVENDER HONEY adapted from Williams-Sonoma’s Savoring France
Ingredients
4 tsp fresh lavender blossoms or 2 tsp dried blossoms
4 tsp herbes de provence
1 tsp fresh ground pepper
1 1/2 tsp salt
1 duck, about 5.5 lb
4 TBSP lavender, acacia or other strong-flavored honey
3 TBSP red wine
The day before: Mix the spices and herbs together in a small bowl. Remove the giblets from the duck cavity, rinse the duck and pat it dry. Using a sharp knife, cut crisscrosses through the fat — but not into the meat — of the breast. Rub the duck inside and out with the herb mixture. Discard the neck. Let marinate overnight, or at least 3 hours.
Preheat oven to 350 degrees Fahrenheit.
Roast for 2 hours. Remove form the oven and pour off all but 1 TBSP of the collected fat from the pan (I reserve the fat and make french fries with it, but that is admittedly over the top!). Spread the duck breast with 2 TBSP of honey and return to the oven for another 10 minutes. Baste with pan juices, and roast another 10 minutes. Remove duck again and spread with the remaining 2 TBSP honey, and sprinkle with half the lavender blossoms. Roast for 10 minutes longer, then baste again with pan juices. Cook for another 5 minutes and remove form the oven.
Move the duck to a platter, cover the it loosely with aluminum foil, and let stand for 10 minutes while you prepare the sauce.
Put the roasting pan over medium heat and add the remaining lavender blossoms and the red wine. Deglaze the pan, stirring with a wodden spoon to remove any browned bits from the pan bottom. Cook until well blended and slightly reduced, 3-4 minutes. Keep warm.
Carve the duck, place on a platter, drizzle with sauce and serve immediately.


 I’m about as vegan as Fox News is liberal (I recently purchased a vegan leather jacket, because, how often do you find a jacket made of vegans?), but when I was killing time one day while my kids were at their riding lesson when I started reading a vegan cookbook. And it was fascinating. It was like cooking within a completely different universe. The fundamentals were different. It was like learning another language. Switching from PC to Mac. Learning to write with your navel. I’ll come up with the right analogy eventually.